Since version 1.36.0, the Ultimate Addons for Elementor (UAE) come with the Twitter Feed widget. Now you can embed your Twitter feed to any Elementor-built page or post.
This article will show you how to set up the “Twitter Feed” widget and add it to your website.
Twitter Feed Setup
The Twitter Feed widget needs to communicate with Twitter to fetch the information from your account. Thus, you need to get the Twitter Consumer Key and Consumer Secret key.
Firstly, you need to have a Twitter Developer Account or create one if you don’t have it already. Also, you’ll need to have a verified phone number and e-mail address on your account.
Once you’re ready, follow these steps to get your Twitter API keys:
Step 1 – Log in to your Twitter Developers Account. Here, click on “Developer Portal” in the top right corner;

Step 2 – Next, you need to create a project and app. Click on the “Create Project” button and follow the instructions.
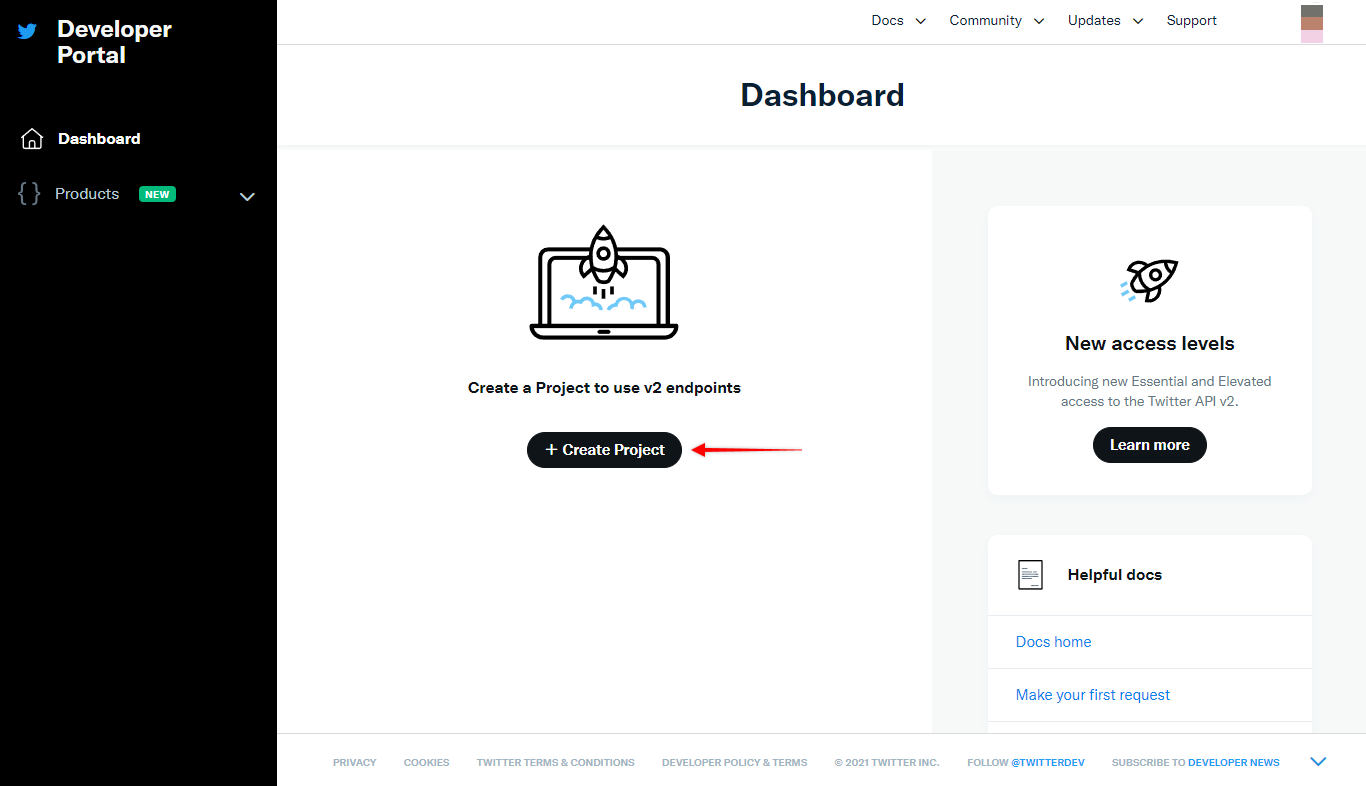
Accordingly, add your project name, set use case (Embedding Tweets in a website), description, and app name. Project and app names can be anything you like. To illustrate, we’ll name both our project and app “UAE Twitter Feed”;
Step 3 – After creating a project you will need to apply for Basic access
The reason you need to purchase the Basic plan – We are using Twitter API v2 to fetch Twitter data, so under free access, we cannot retrieve tweets. Hence, we require Basic access to fetch data from API v2
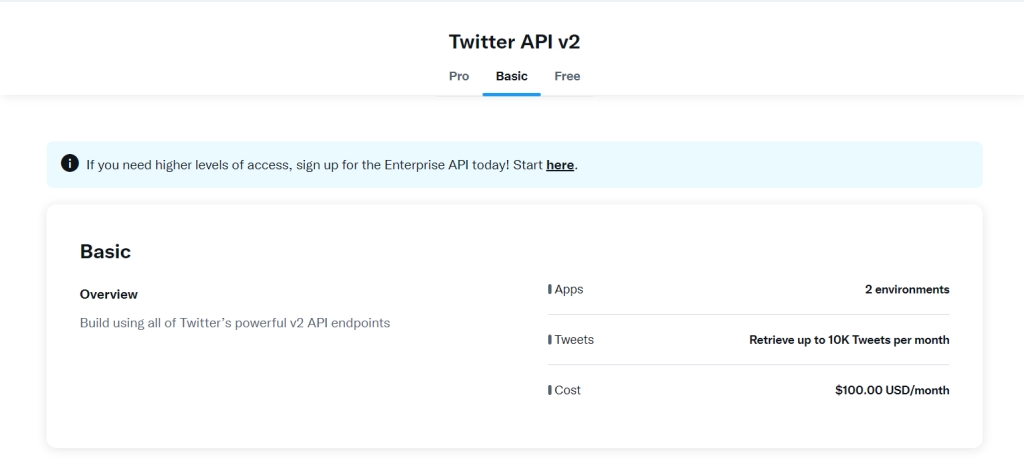
How can I apply for Basic access?
You can apply for basic access by using this link.
For More Information:
Step 4 – You will see your API key and Secret Key on the last step. Save these safely to add them to the UAE settings next.
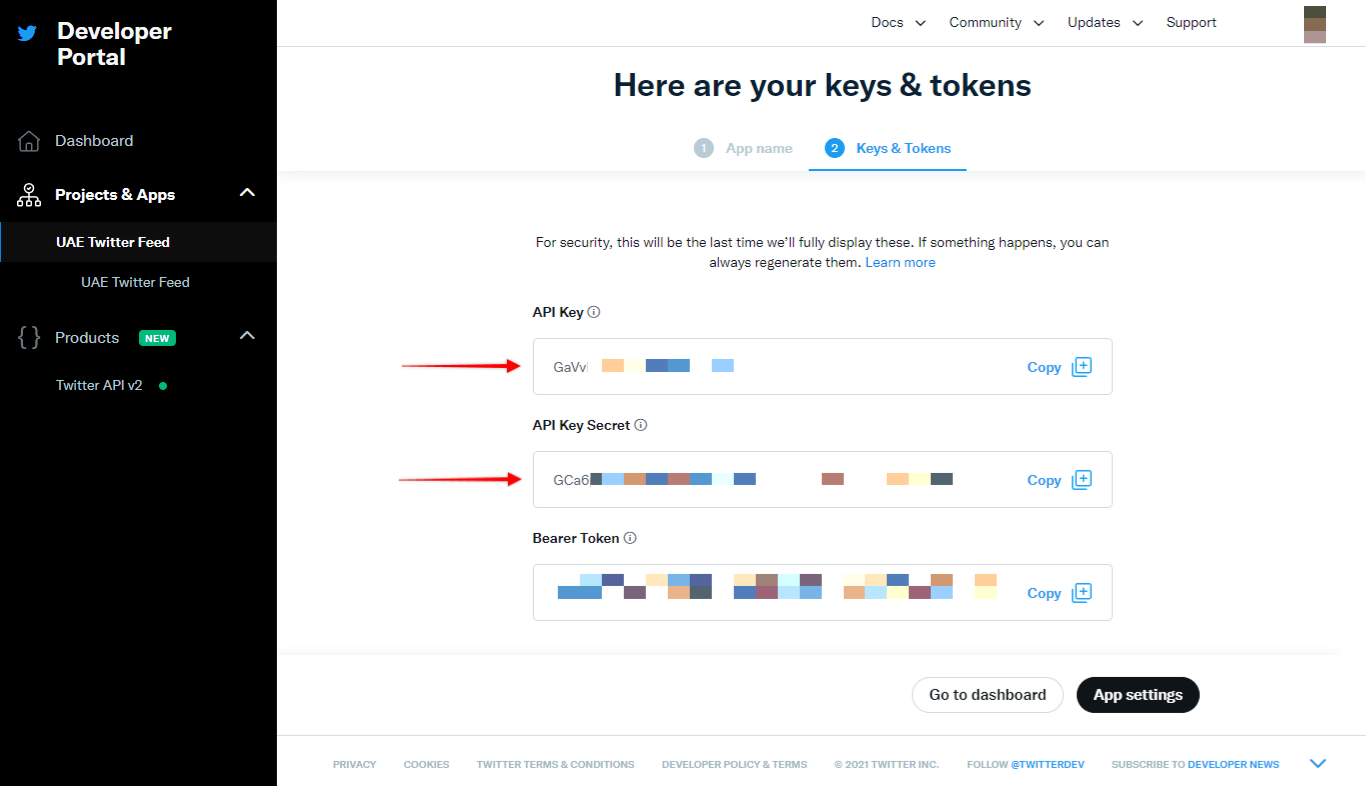
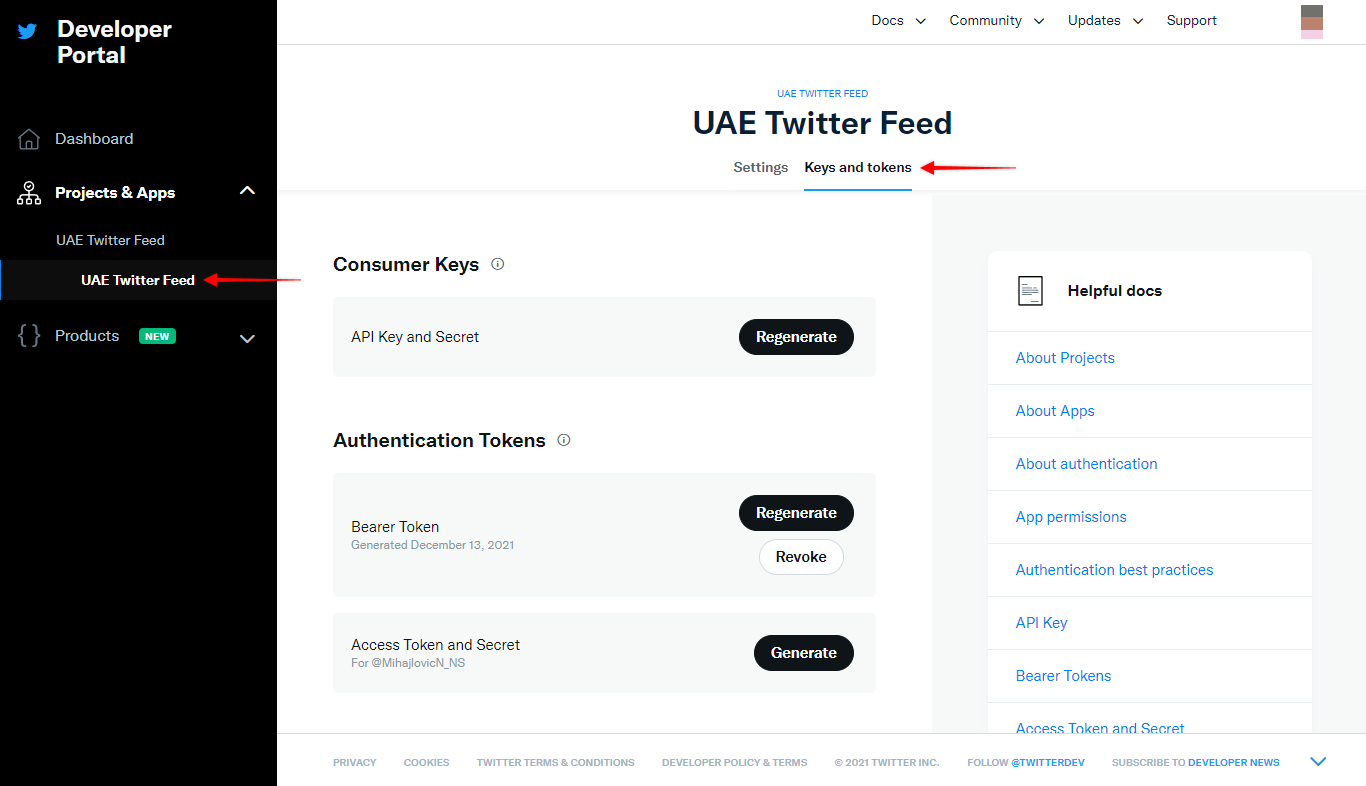
If you lose these keys and need them again, you can regenerate new ones. To do this, navigate back to your Developer Portal > Project > App.
Next, click on “Keys and Tokens”, and under “Consumer Keys”, click on the “Regenerate” button. This will generate a new Consumer Key (API Key) and Consumer Secret (API Secret).
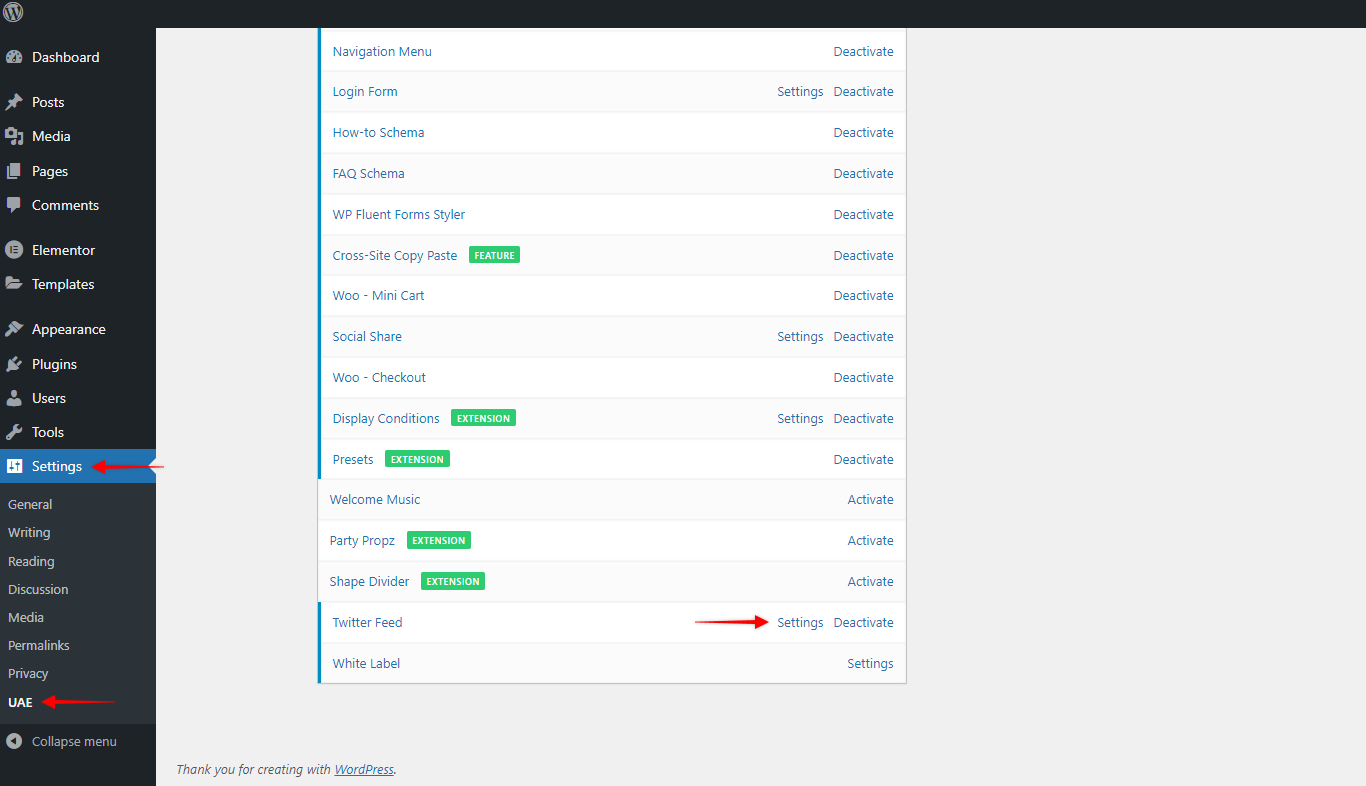
Step 5 – Login to your website and navigate to Dashboard > Settings > UAE. Scroll down to “Twitter Feed” and make sure that the widget is active. Now click on “Settings”;
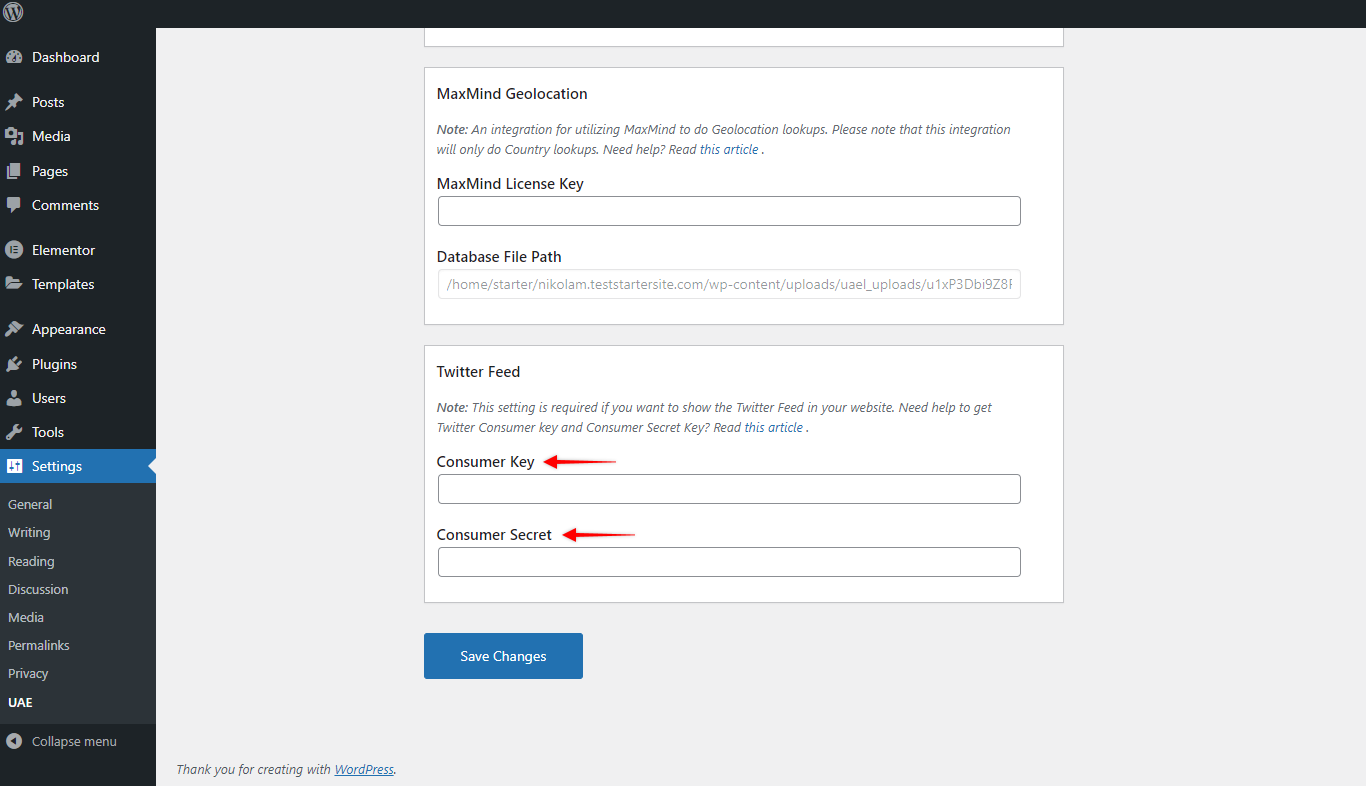
Step 6 – In Settings, scroll down to “Twitter Feed” and add your Consumer Key (API key) and Consumer Secret Key (API Secret) to UAE integration settings. Click “Save changes” to save your keys.
Note:
You can use the same Consumer Key and Consumer Secret Key on multiple sites.
Now, you can use the Twitter Feed widget on your posts and pages.
Add Twitter Feed To Page or Post
Now that your Twitter Feed widget is all set up, let’s add it to posts and pages:
Step 1 – Start editing your post or page with Elementor;
Step 2 – Search for the “Twitter Feed” widget in your widget list and add it to a page or post. Click on the widget to edit it;
Under the Content tab, you will find several options. Now, let’s start with setting up your account details.
Account
Step 3 – Click on the “Account” and select how you want your tweets to be fetched. Thus, under “Search By”, you need to select “Twitter Handle” or “Hashtag”. You will see the input field under the “Search By” option. This field will adjust to match your selection;
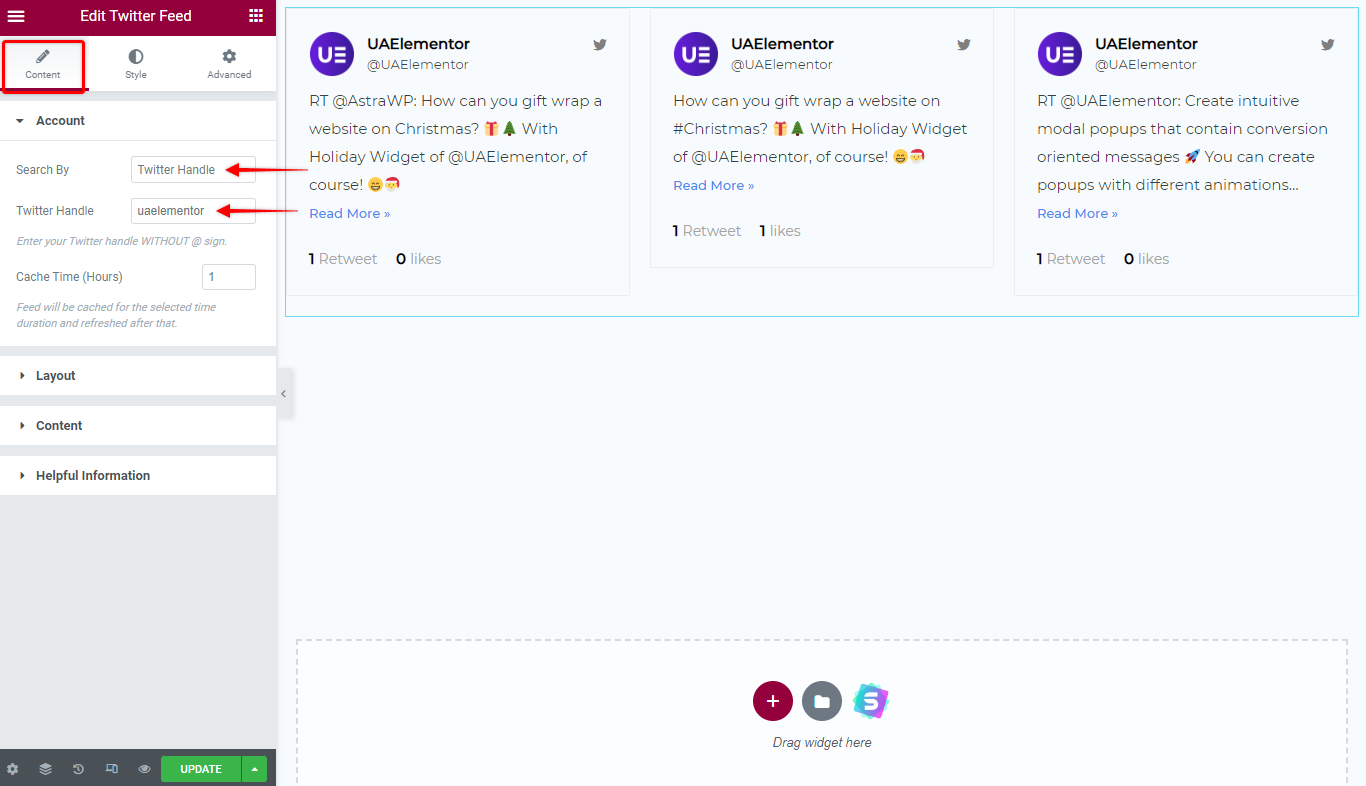
Step 4 – Now, you should add either your Twitter handle or hashtag to the input field;
Step 5 – You can also set the “Cache Time” in hours. The value you set here will determine how often the Twitter Feed widget will refresh your tweets.
Next, we’ll show you how to set your widget layout with settings available under the “Layout” option.
Layout
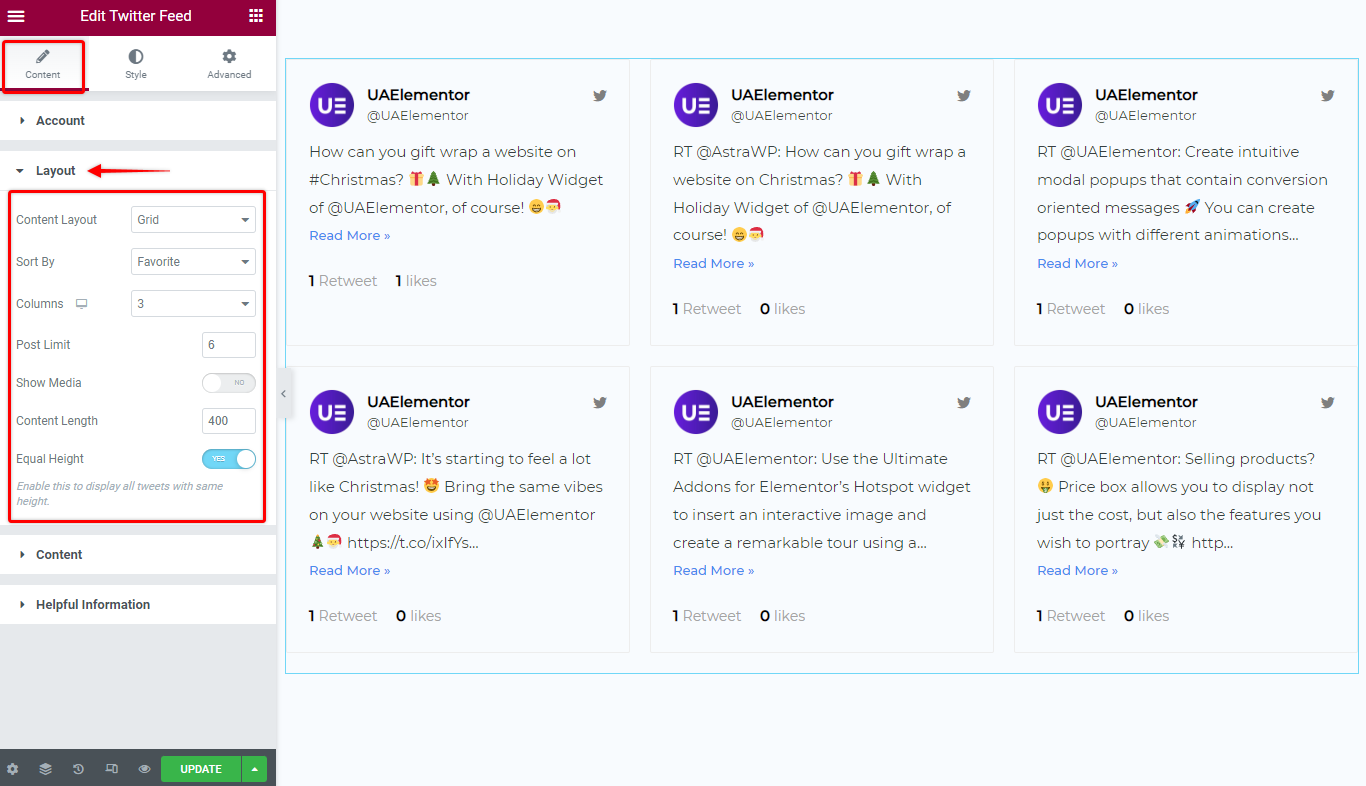
Step 6 – When you click on “Layout”, you will see the following settings:
- Content Layout: you can choose to show your tweets as Grid, List, Timeline, or Carousel;
- Sort By: set sorting to Recent Posts, Old Posts, Favourite, Retweet;
- Columns: you can select the number of columns if you’re using a Grid layout;
- Post Limit: limit the total number of tweets to show;
- Show Media: enable if you wish to show tweet images too;
- Media Size: if media is enabled, you can set its size;
- Content Lenght: length of visible content for each tweet;
- Equal Height: enable to equalize tweet heights if you’re using a Grid layout;
Further, if you set Content Layout to Carusel or Timeline, you will see a new menu option with additional settings for these layouts.
Further, you can control what content will be displayed in your tweets. You will find these settings under the “Content” option.
Content
Step 7 – The Content settings allow you to choose what tweeter feed content you want to display. Hence, you can individually disable the elements that you don’t need.
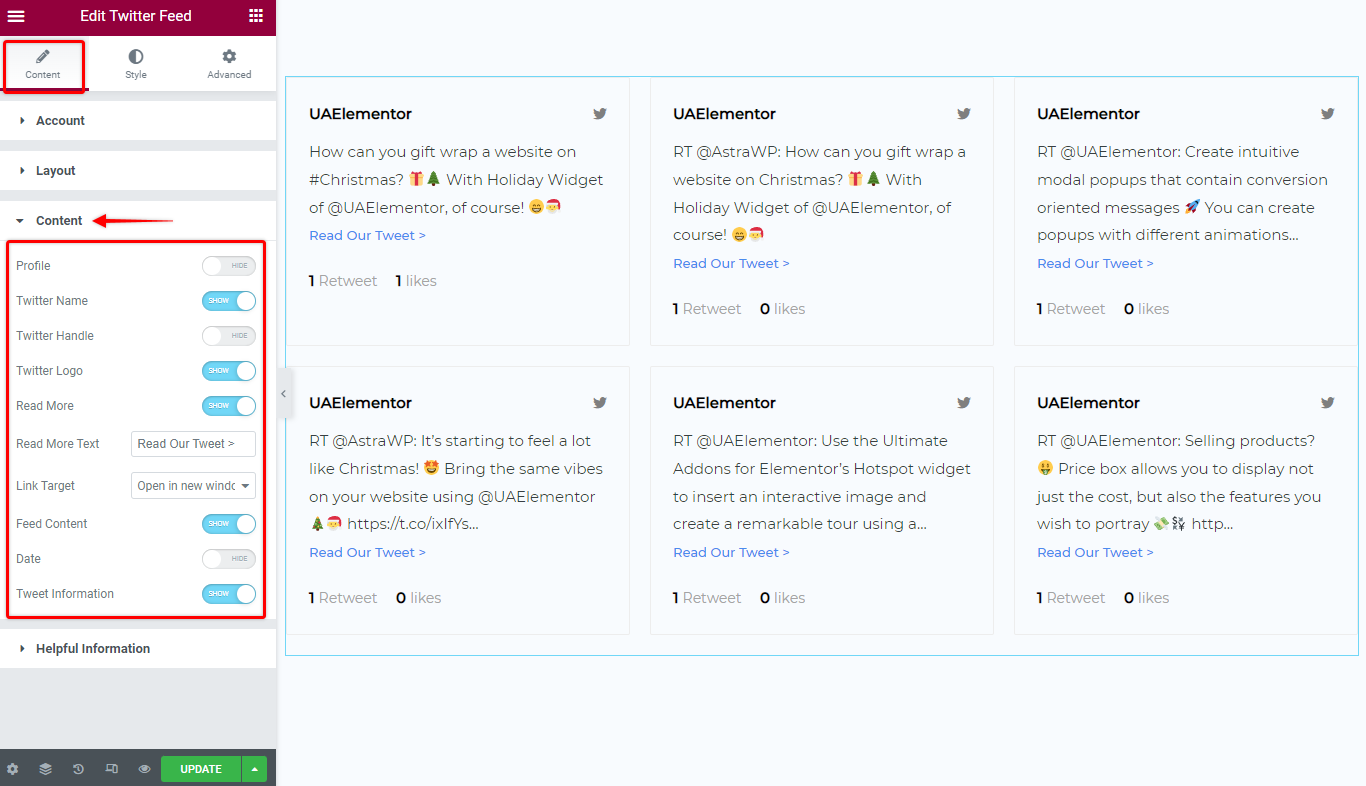
Finally, you can style the content and widget the way you want. You will find these options under the “Style” tab.
Styling Options
Step 8 – In addition, under the Style tab, you will find the following styling options:
- Spacing: spacing settings for the widget;
- Content: set color and typography individually for all content elements (name, handle, feed content, etc.)
- Card: set Padding, Background, Border, Color, Shadow and Alignment for tweet cards;
- Image: modify Profile and Twitter logos;
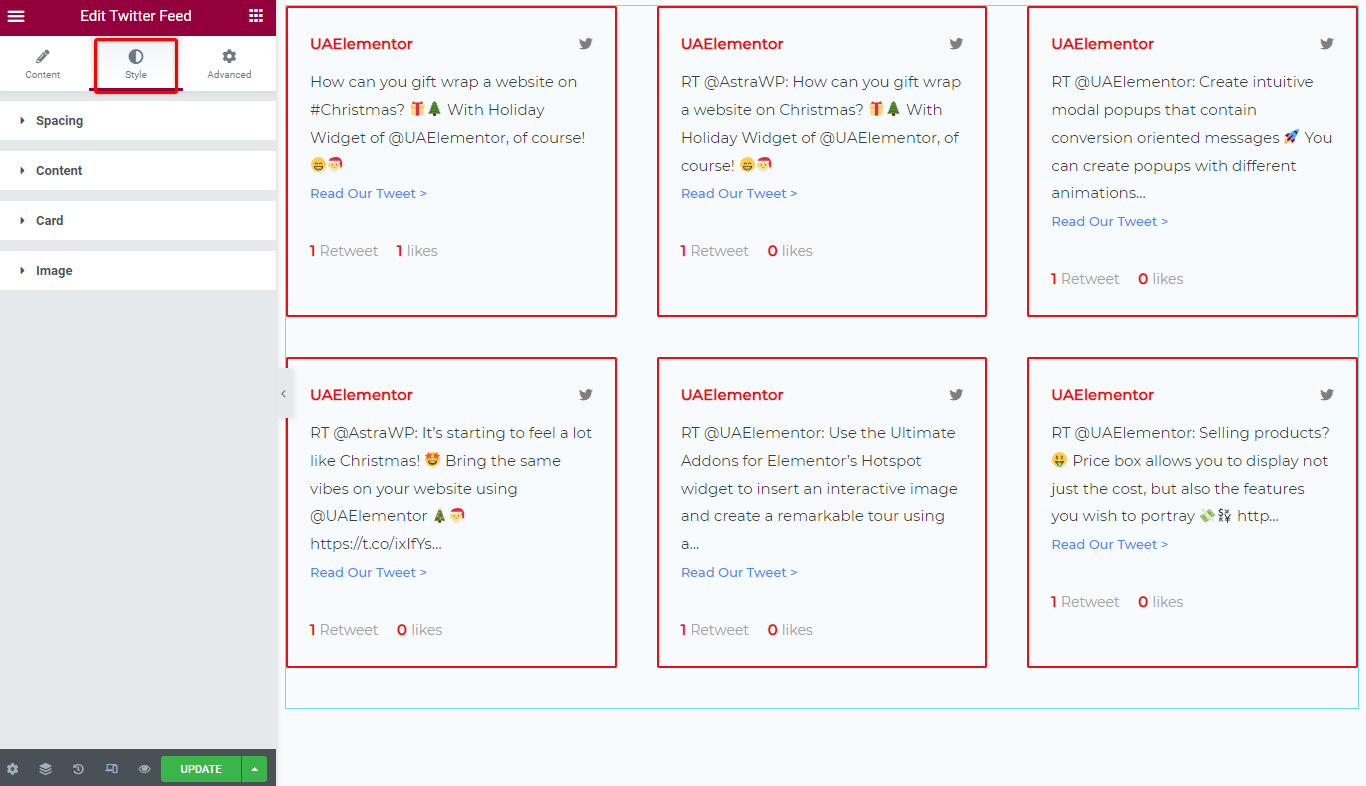
Some of the options are layout-specific. For example, if you choose the “List” as a layout type, under “Spacing”, you will see settings for Rows Gap. This allows you to set a gap size between rows of tweets. Contrary, if you choose the “Grid” as your layout type, you will also see Column Gap settings.