WPML just released its biggest update yet and it’s jam-packed with new features. WPML 4.5 brings the most awaited “Translate Everything” feature along with other significant changes. This update takes automatic translation to the next level.
Translate Everything mode isn’t the only new feature in this release. WPML has also added new payment options, more site keys, a new setup wizard, and a range of bug fixes and code improvements.
Ultimate Addons for Elementor (UAE) is fully compatible with WPML 4.5 and will work with this new update. We worked closely with the WPML team to ensure everything works seamlessly!

Ultimate Addons for Elementor and WPML
WPML makes the translation process easy . You can translate your website in two ways, manually or automatically.
With the manual method, you can choose what content to translate and how you would like to add translations. This way, you can add your translations manually as you could in previous WPML versions.
With this new update, you have a second way. You can choose the new “Translate everything” feature that automatically translates all of your website’s content.
This means that all of your posts, pages, custom fields, and other site content will be translated into every language you select.
Ultimate Addons for Elementor (UAE) is fully compatible with WPML. This means that all the content you created using UAE widgets will be translated too!
You will find the “Translate Everything” option available within the WPML Setup Wizard.
Make Your Website Multilingual with Translate Everything
Let’s see how you can use WPML and its new feature to make your website multilingual and translate UAE widgets.
To translate your entire website with WPML, you will need the following list of plugins:
- WPML Multilingual CMS
- String Translation
- Media Translation
You can download these plugins from the “Download” section of your WPML account. Then simply install and activate these plugins on your website in the usual way.
When you activate the WPML Multilingual CMS plugin, you will see a notification in your WordPress dashboard to start configuring it.
This will activate the WPML Setup Wizard that will guide you through this quick and straightforward process.
That process looks a little something like this:
- Choose the “Default language”. This is the language your existing website content is written in.
- Configure the “Translated languages”, by adding the languages you want to translate your content into.
- Next, decide what your URLs for different languages will look like, and register your WPML plugin.
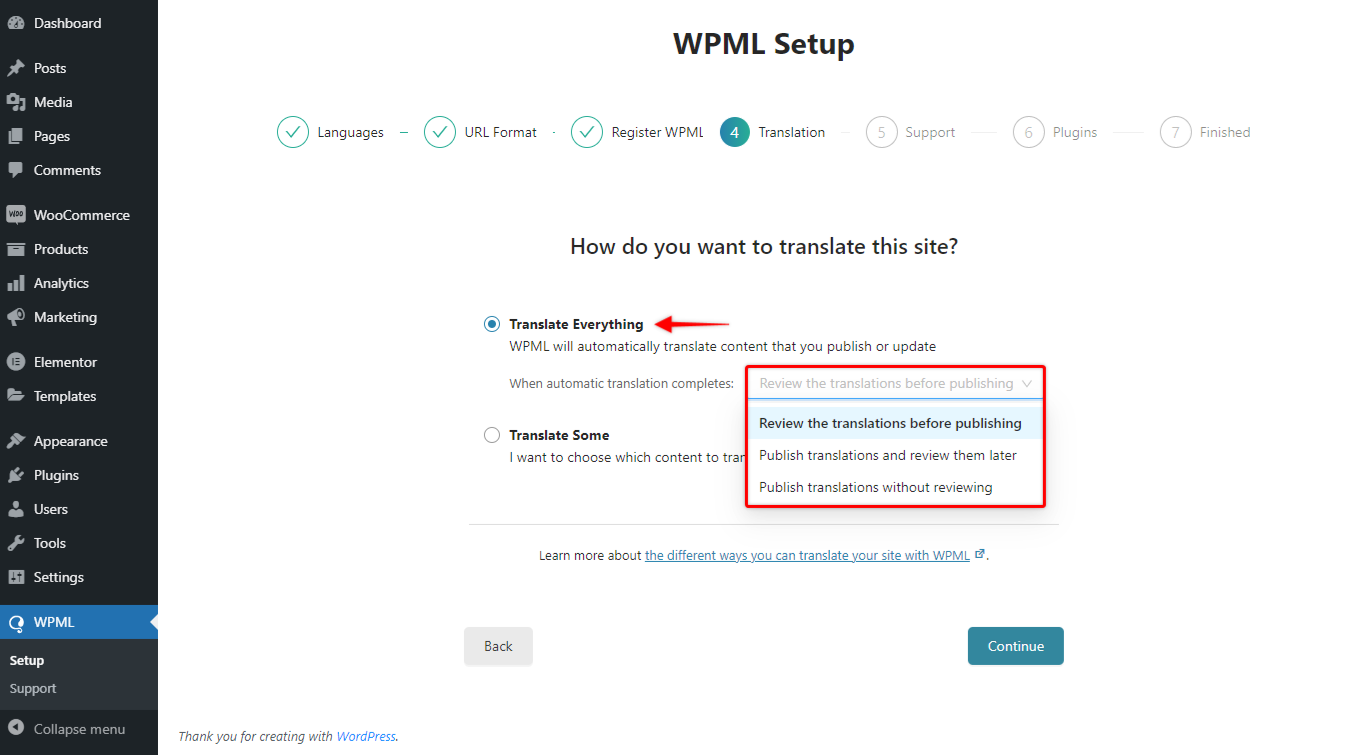
- You will find the “Translate Everything” option on the fourth step. Select the option and decide if you wish to review the translations before publishing. We’ll talk more about translating your website using the “Translate Everything” feature further down.
- Finally, there are a few more steps to go through, and the whole process is complete.
When you’re done with the Setup Wizard, WPML will add a language switcher to the bottom of your footer by default, and your multilingual website is ready.
It’s as simple as that!
Translate Everything Explained
As mentioned above, you’ll need to configure WPML the first time you use it. The WPML Setup Wizard will let you decide how you want to translate your website. As we’re discussing the Translate Everything feature, let’s cover that here.
Step 1 – Start the WPML setup process using the wizard as described above. Choose the languages you want to have on your website, configure the URLs and register your WPML plugin;
Step 2 – On the fourth step of the setup process, choose the “Translate Everything” option. This will duplicate all your existing published content and automatically add translations for all languages you added in Step 1;

Step 3 – You will notice the dropdown menu beneath this option. Here, you need to decide if you wish to review the translations before publishing. We recommend checking all content before publishing, just in case;
Step 4 – Finish the remaining steps in the Setup Wizard;
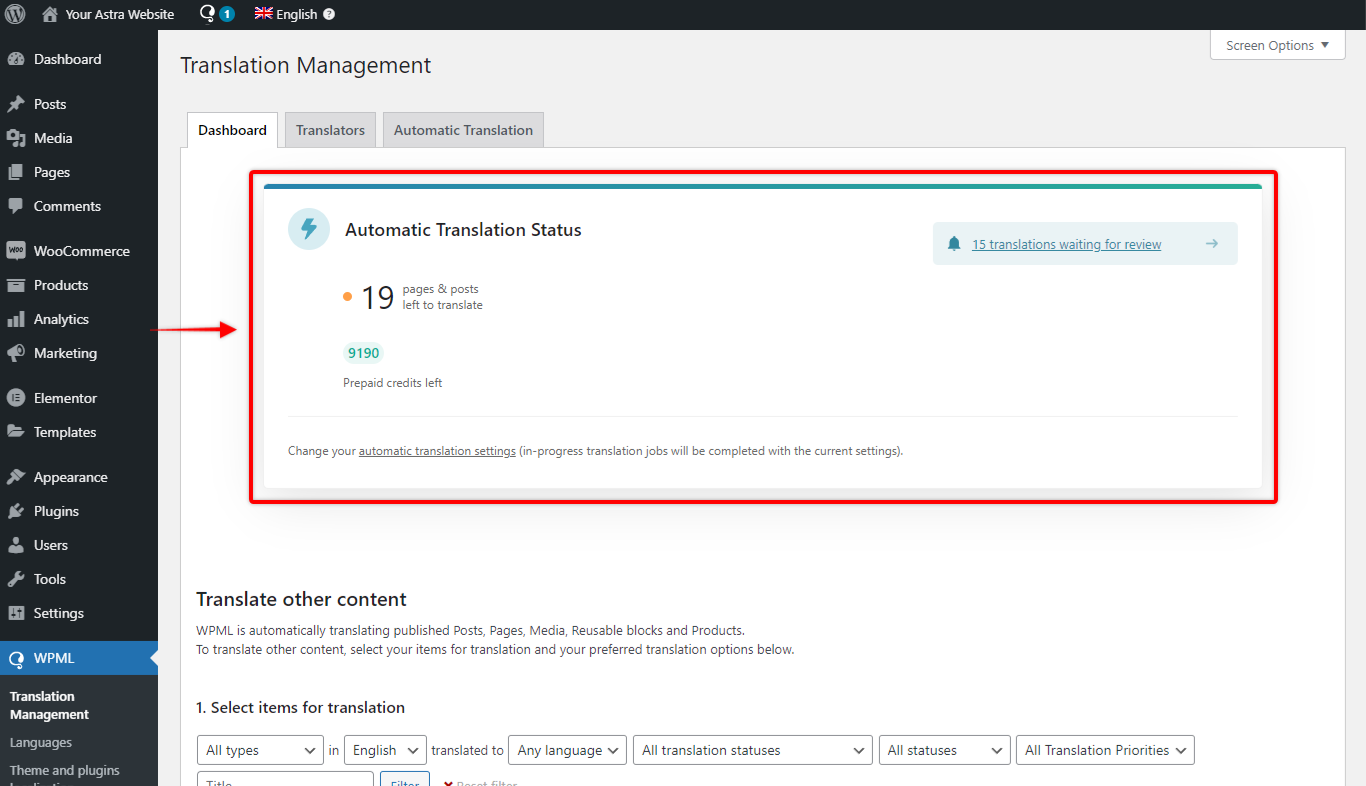
Step 5 – You will automatically be transferred to the “Translation Management” page (Dashboard > WPML > Translation Management).
You will see the “Automatic Translation Status” notification on this page showing your translation summary and available credits.
Now, you can review translations (if you chose this option during setup) and publish them when ready.

Keep in mind that the “Translate Everything” is a paid option. You’ll need a WPML Automatic Translation Account with available credits on it.
To sign up for an Automatic Translations account, log in to your existing WPML account.
To buy credits, click on the “Automatic Translation” tab and purchase the required amount.
Review Automatic Translations
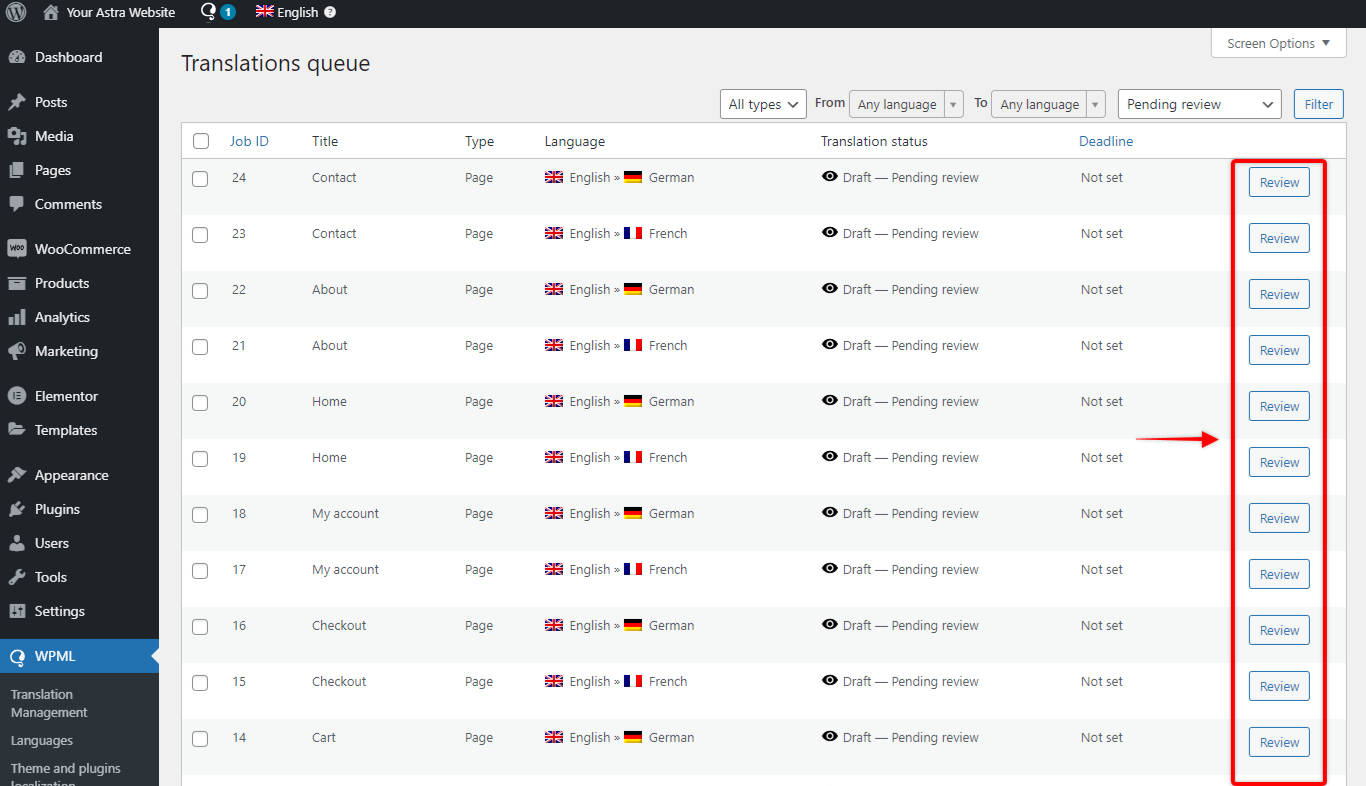
From the “Automatic Translations Status” notification (WPML > Translations Management > Dashboard), you can access the “Translation queue” to review translations for each page and post:

If you are satisfied with the translation, just accept it, and your page or post will be published.
When reviewing the automatic translations, you’ll have the option to modify any translated content to match your needs perfectly.

It’s important to note the “Translate Everything” feature can only translate published posts and pages. That doesn’t include any drafts you might have on your website.
If you notice that some labels on your website are missing translation, you can translate these manually.
Navigate to Dashboard > WPML > String Translation and simply search for the string you wish to translate.
That’s it! Your Elementor website is translated and ready for your visitors in multiple languages!
In addition, it’s good to know that when you enable the “Translate Everything” mode, WPML will continue adding automatic translations. Thus, any new page or post you add down the line will be automatically translated. Further, you can modify the Translation mode settings at any moment (Dashboard > WPML > Settings > Translation mode).
WPML was already the ultimate translation tool. This new Translate Everything feature has not only made the plugin more powerful, but more convenient too. It’s an excellent upgrade to an already superb translation plugin!


