/
No results found. Try again with different words?
Search must be at least 3 characters.
- How to activate Ultimate Addons for Elementor license?
- How to Get License Key of Ultimate Addons for Elementor?
- About Beta Versions
- How to install the Ultimate Addons for Elementor plugin?
- Getting Started with Ultimate Addons for Elementor
- Enabling Automatic Beta Updates for UAE
- How Can I Upgrade the License?
- How to Update Ultimate Addons for Elementor Plugin?
- How to update any plugin manually through FTP?
- About Beta Versions
- How to Enable / Disable Widgets in UAE to Reduce Server Requests?
- How to White Label UAE?
- Getting Started with Ultimate Addons for Elementor
- UAE Saved Sections
- How to create Google API key in Google Maps Widget of UAE?
- White Screen /500 Error After Plugin Installation
- How to Increase the Memory Limit of your site?
- Unable to see the Font Awesome 5 Icons in UAE’s widgets?
Instagram Feed Widget
Since version 1.36.0, the Ultimate Addons for Elementor (UAE) come with the Instagram Feed widget. Now you can embed your Instagram feed to any Elementor-built page or post.
This article will show you how to set up the “Instagram Feed” widget and add it to your website.
Instagram Feed Setup
The Instagram Feed widget needs to communicate with Instagram (Meta) to fetch the information from your Instagram account. Thus, you need to get the Instagram App ID, App Secret, and Access Token.
Firstly, you need to have a Meta (Facebook) for Developers Account or create one if you don’t have it already.
Create App
Once you’re ready, follow these steps to get your Instagram App Details:
Step 1 – Log in to your Meta for Developers Account. Here, click on “My Apps” in the top right corner;

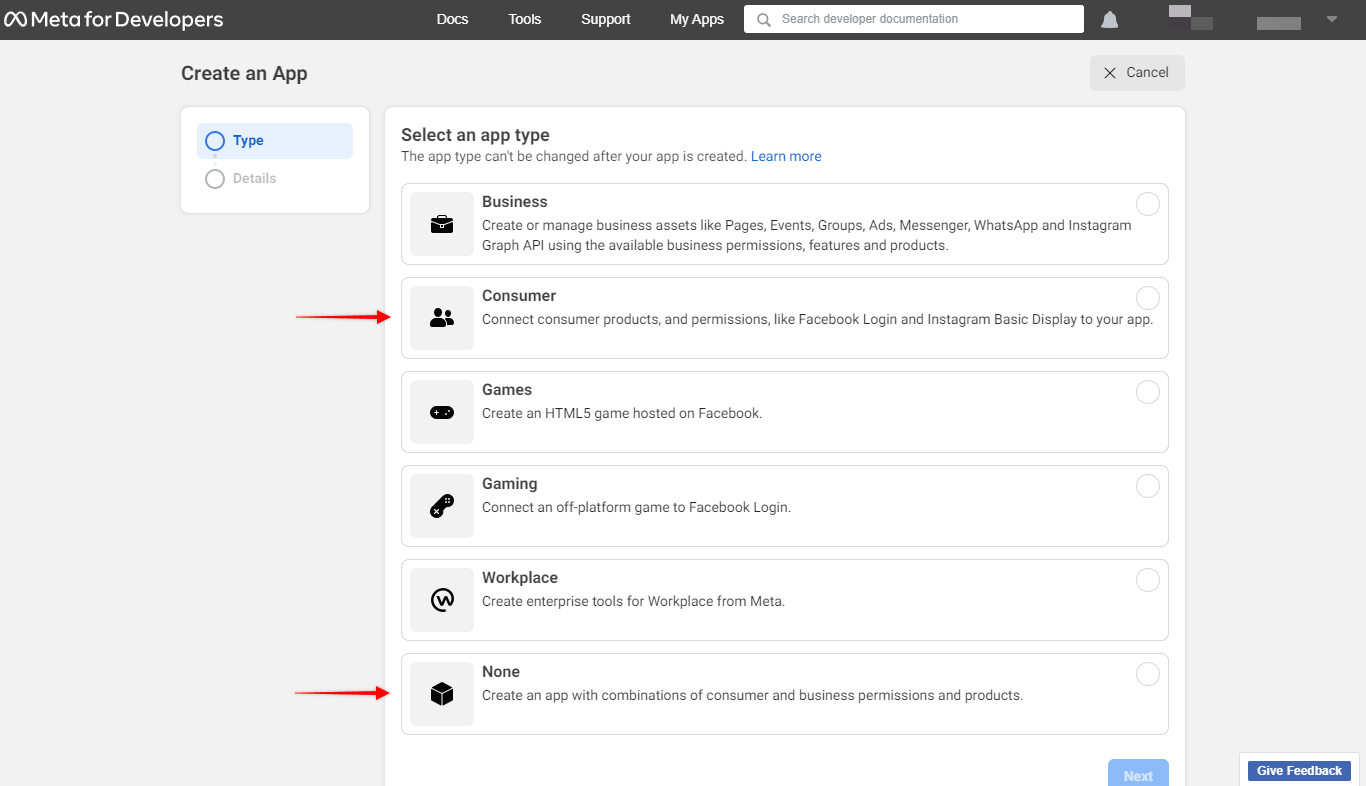
Step 2 – Next, you need to create a new app by clicking on “Create App”. Here, choose the Consumer or None app type and click “Next”. Give your app a name and click the “Create App” button;
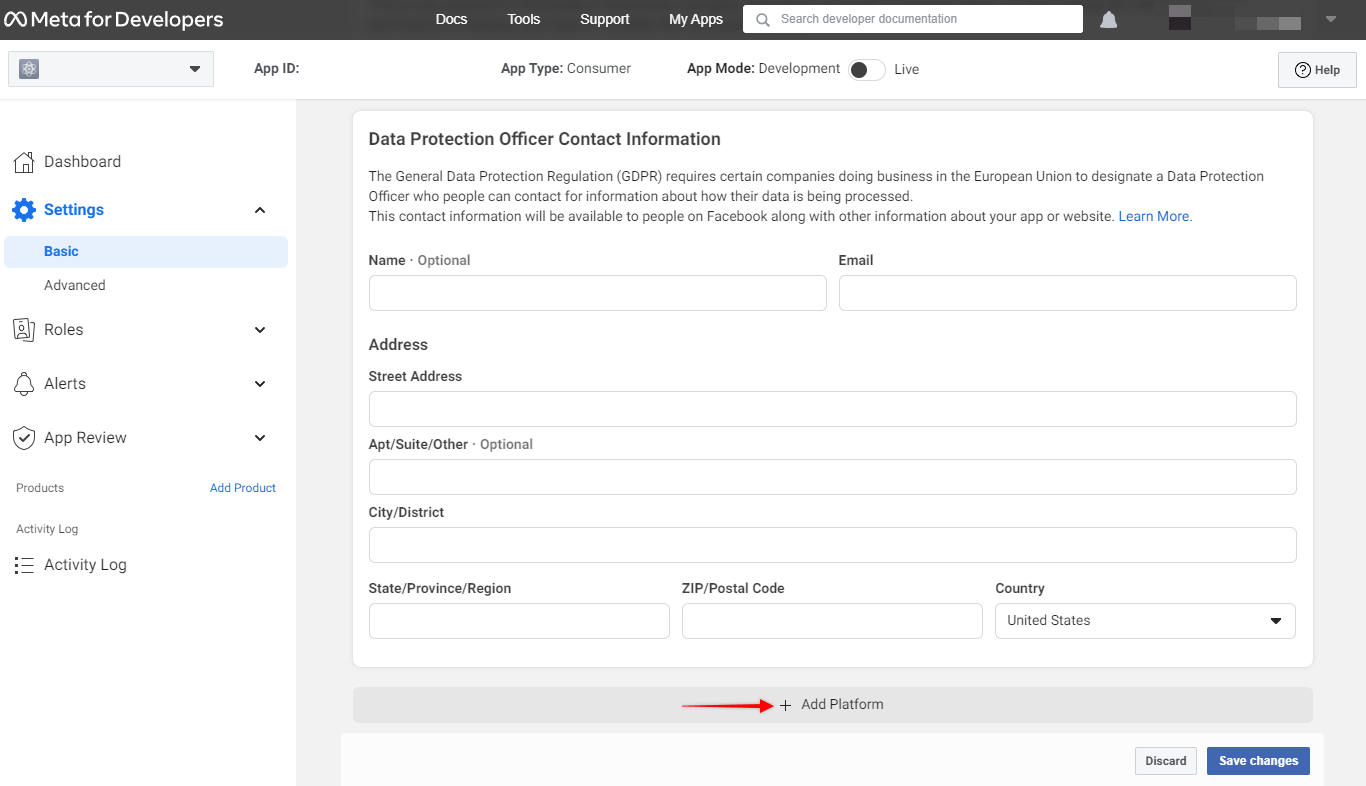
Step 3 – Once your app is created you’ll be redirected to your App Dashboard. Here, start by navigating to Settings > Basic, scroll down to the bottom of the page, and click “Add Platform”. Select “Website” and click “Next”;
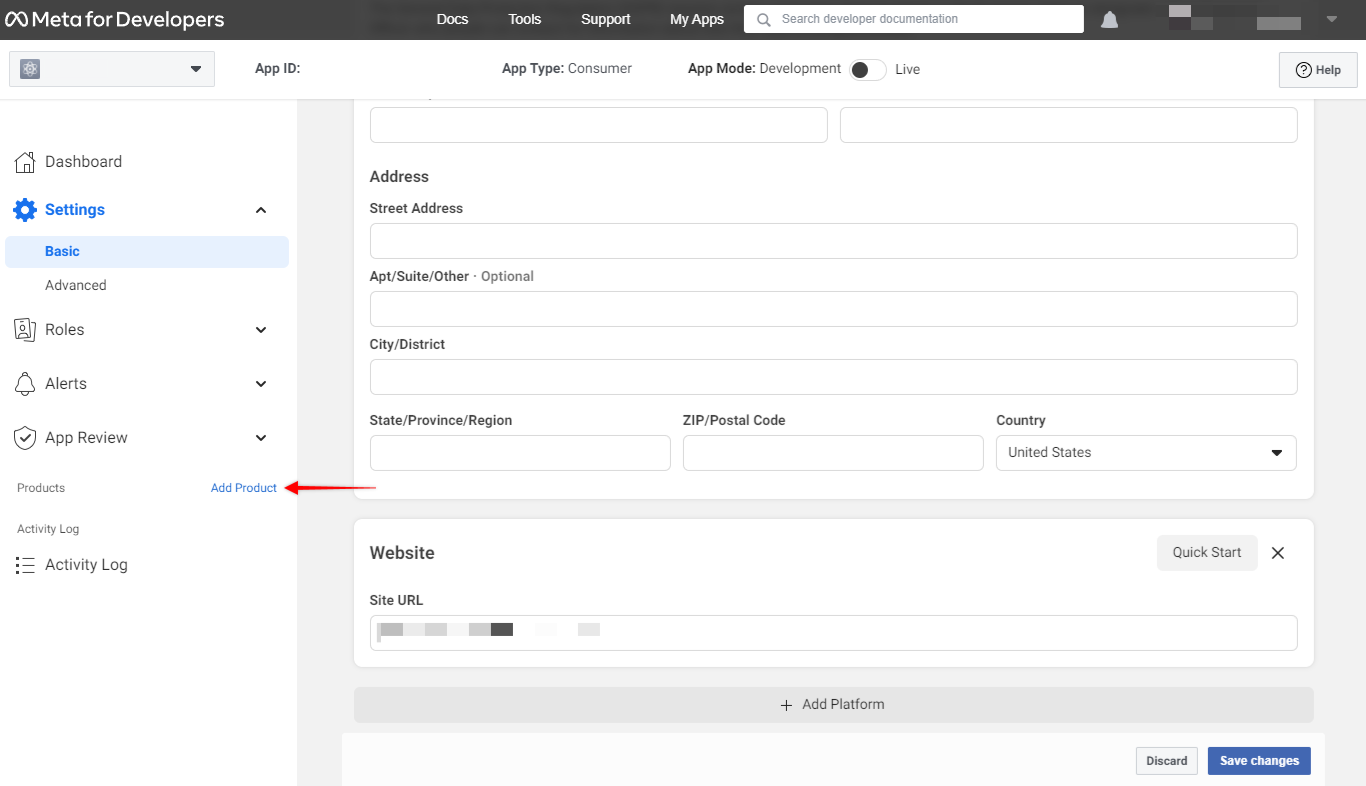
Step 4 – Now, you will see that a new section with the Site URL field appeared. Add your website URL here and save changes;
Note:
To successfully save changes, you’ll also need to add your Privacy Policy URL and User Data Deletion URL. You will find these settings in the top section under the Basic app settings (Settings > Basic). At this stage, you can also use your website URL but you’ll need to replace them with valid URLs later.
Instagram Basic Display
Further, you need to add the “Instagram Basic Display” product and configure it.
Step 5 – On your App Dashboard, in the menu click on “Add Product”;
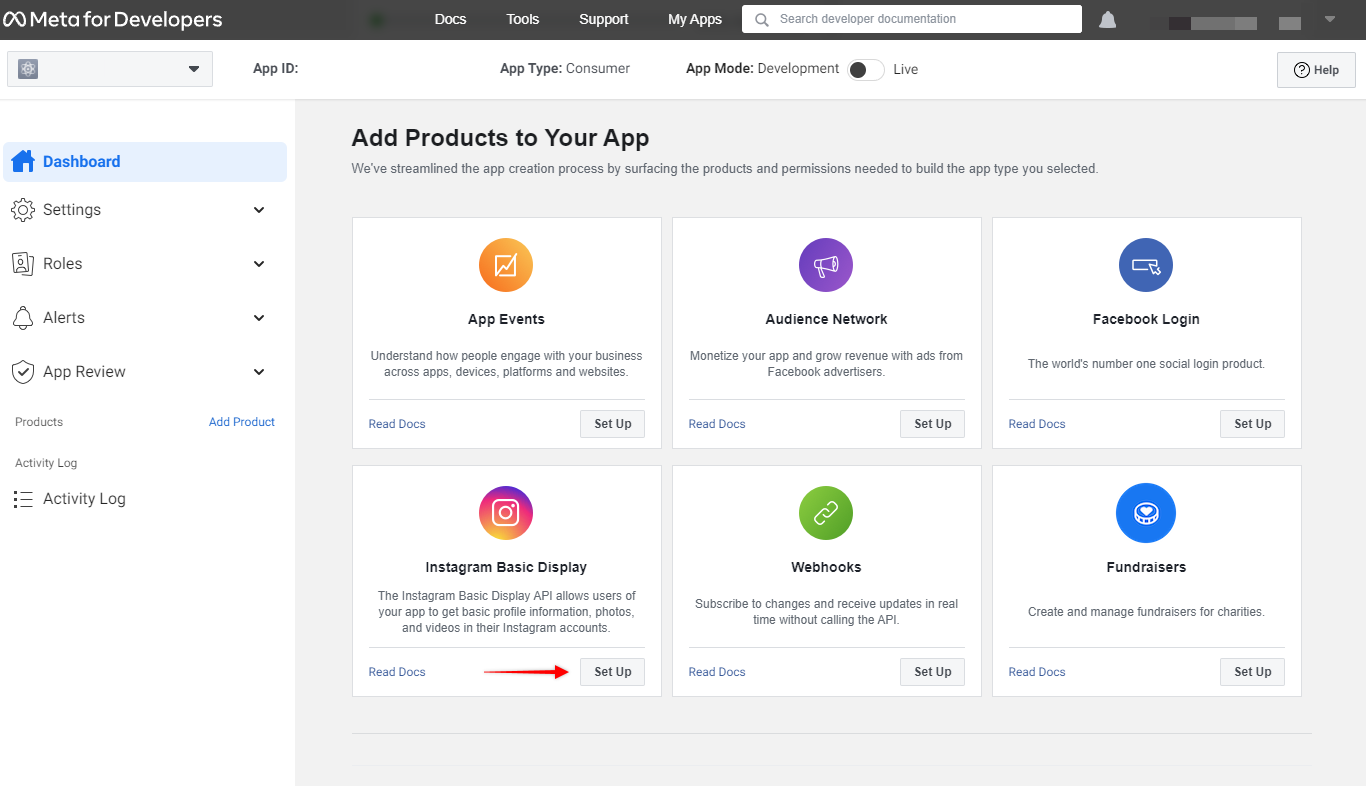
Step 6 – Scroll down to Instagram Basic Display and click on the “Set Up” button;
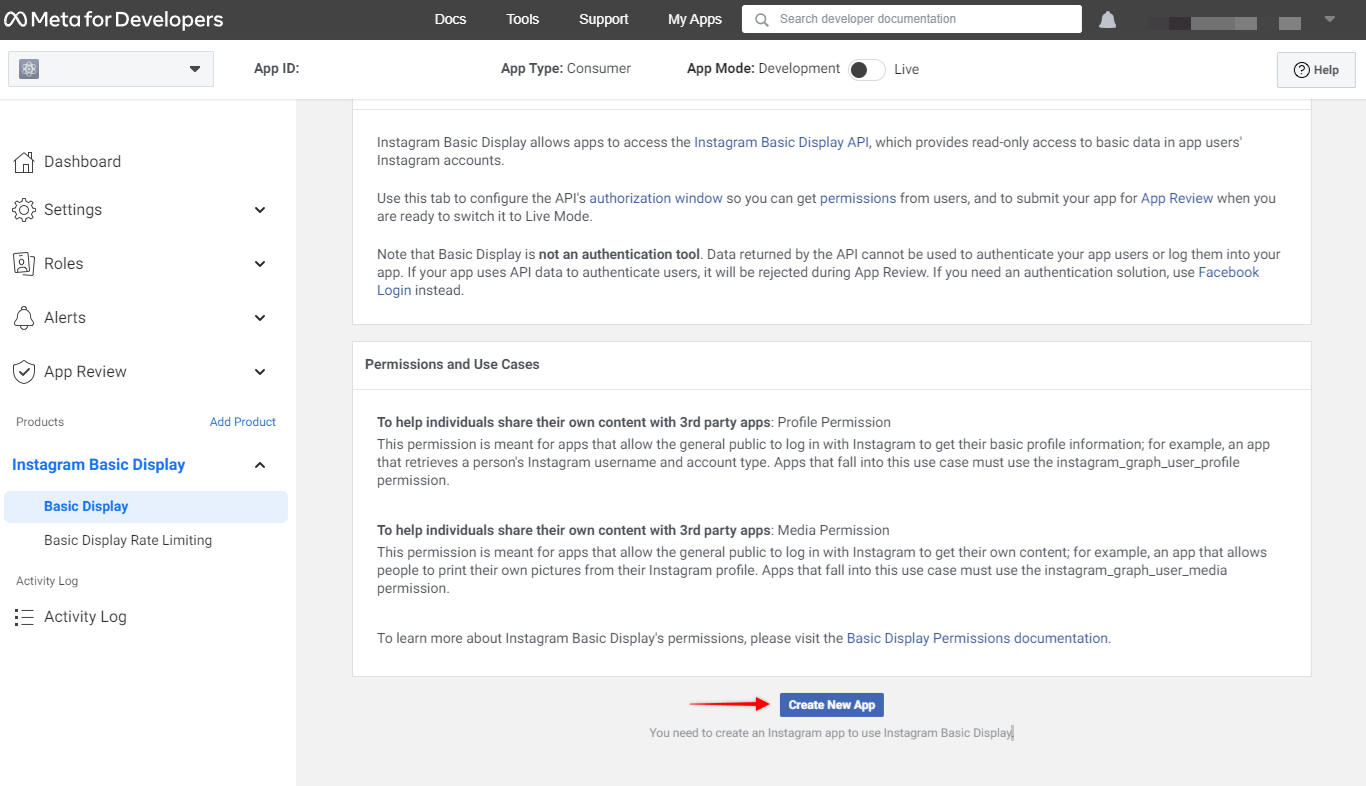
Step 7 – After you added the Instagram Basic Display product, navigate to Instagram Basic Display > Basic Display, scroll to the bottom of the page, and click “Create New App”;
Step 8 – Give your Instagram Display App a name. Next, the form will appear. You need to fill in the following fields:
- Valid OAuth Redirect URIs: dedicated URI that can capture redirect query string parameters;
- Deauthorize Callback URL: URL that can handle deauthorization notifications;
- Data Deletion Request Callback URL: URL that can handle data deletion requests;
At this stage, you can also use your website URL for these fields. Keep in mind that you’ll need to replace them later with valid URLs.
Click on “Save Changes” when you’re done to save the app
Add an Instagram Test User
Also, you must add an Instagram tester user to your app before generating access tokens:
Step 9 – In your App Dashboard, navigate to Roles > Roles and scroll down to the Instagram Testers section. Click “Add Instagram Testers”, add your Instagram account username, and send the invitation;

Step 10 – Next, open another tab and log in to your Instagram account. Navigate to Profile > Edit Profile > Apps and Websites > Tester Invites and accept the invitation.
Get Your Instagram App API Details
Firstly, you’ll need to generate the Access token to fetch the posts/data from your Instagram account. Secondly, you’ll need to get your App ID and App Secret keys:
Step 11 – Return to your App Dashboard (Meta for Developers). Here, click on your app and navigate to Instagram Basic Display > Basic Display.
Step 12 – Here, scroll down your Instagram App ID and Instagram App Secret section. Copy these and save them for later
Step 13 – Afterwards, scroll further down to the User Token Generator section. Now, you will see a list of test users here. Click on the “Generate Token” button for the user you previously added. Click “Allow” on the popup window.
Once your access token is generated, copy the token and save it together with your App ID and App Secret.
Set Up Your Instagram Feed Widget
Finally, it’s time to set up your Instagram Feed Widget:
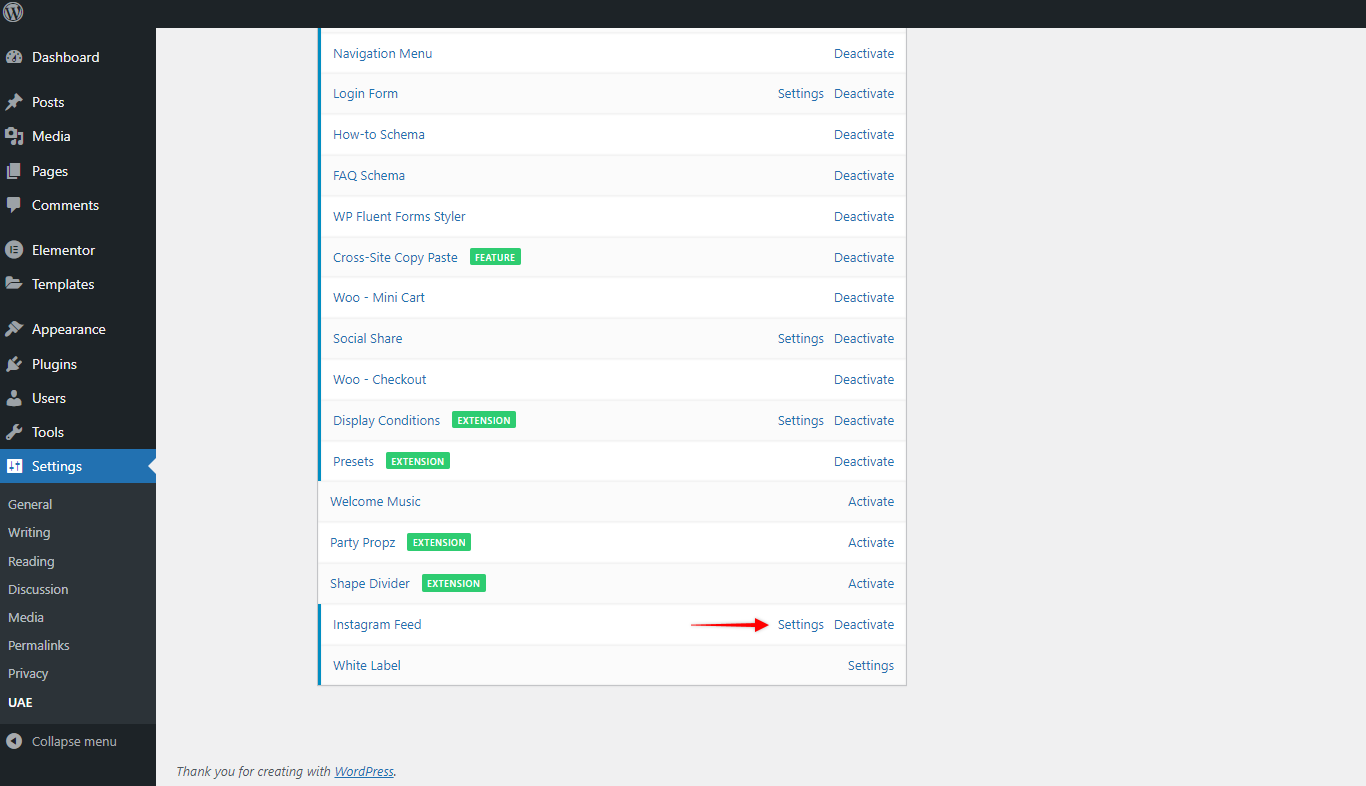
Step 14 – Login to your website and navigate to Dashboard > Settings > UAE. Scroll down to “Instagram Feed” and make sure that the widget is active. Now click on “Settings”;
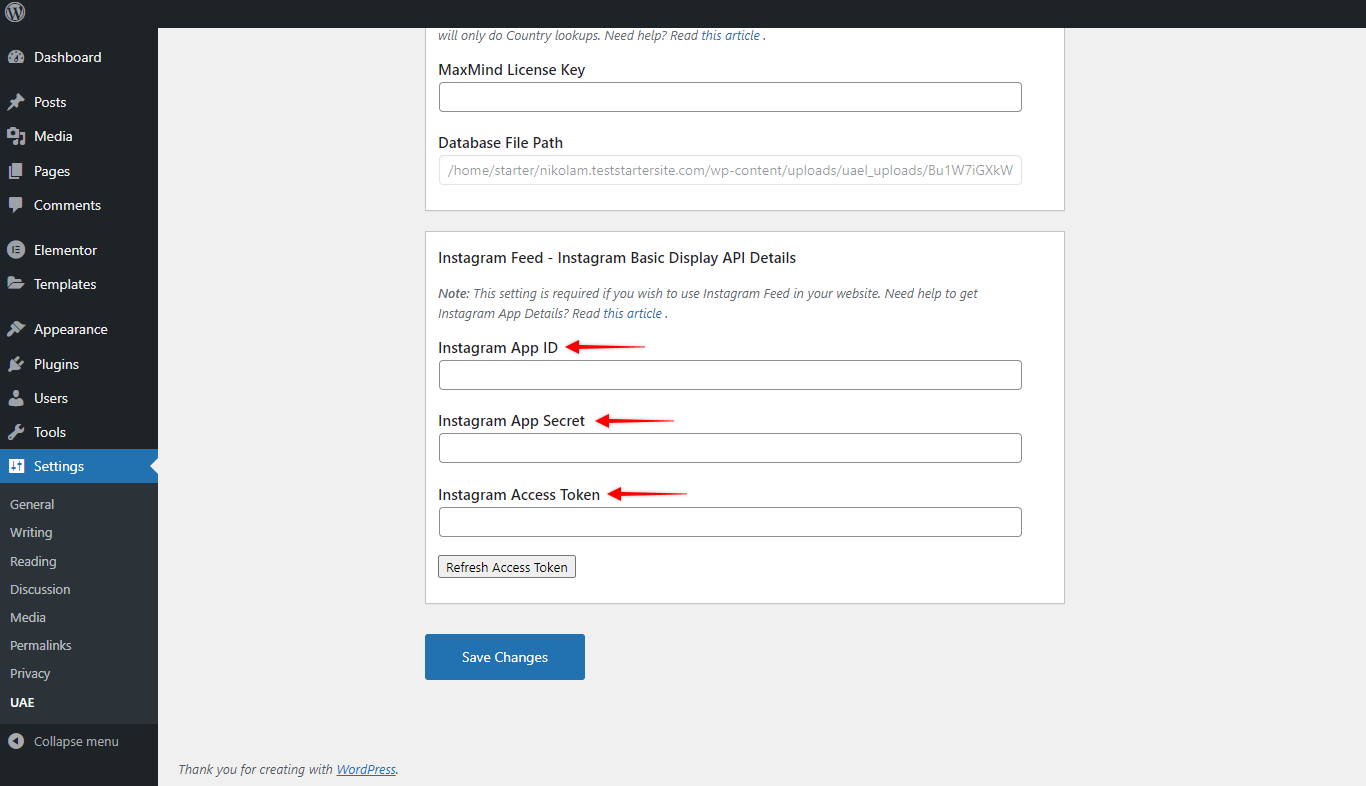
Step 15 – In Settings, scroll down to “Instagram Feed” and add your Instagram App ID, App Secret, and Access Token. Click “Save changes” to save your keys.
Add Instagram Feed To Page or Post
Now that your Instagram Feed widget is all set up, let’s add it to posts and pages:
Step 1 – Start editing your post or page with Elementor;
Step 2 – Search for the “Instagram Feed” widget in your widget list and add it to a page or post. Click on the widget to edit it;
Under the Content tab, you will find Layout Settings and Additional Settings. Further, you can style your Instagram Feed with Style Settings located under the Style tab.
Layout Settings
Step 3 – Firstly, you need to choose if you want to show your posts as a Grid or Masonry. You can choose one of these options by clicking on the Layout Type dropdown;
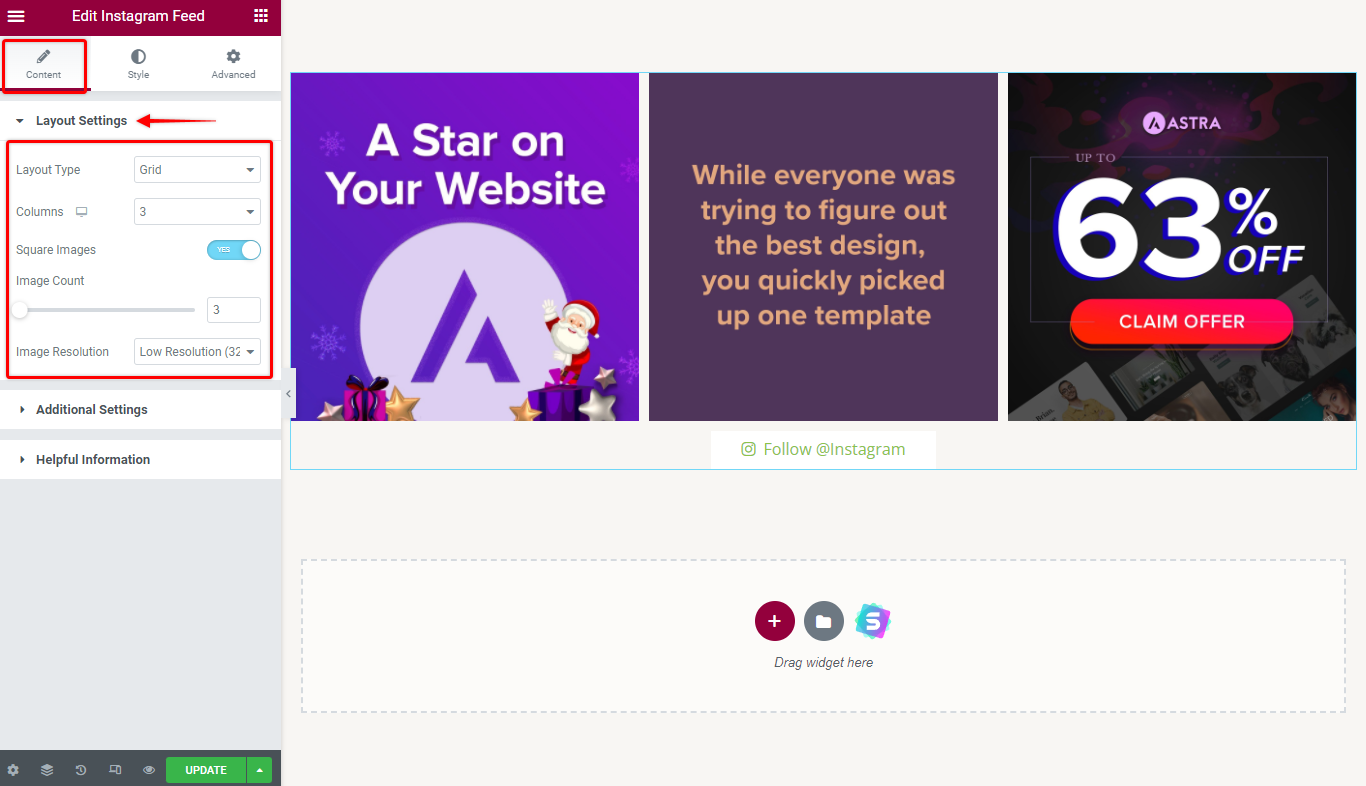
Step 4 – Next, set the way your images should be displayed with the following settings:
- Columns: you can select the number of columns for your widget;
- Square Images: if you’re using a Grid layout, you can enable this option to crop your images equally;
- Image Count: set the total number of images you wish to display;
- Image Resolution: choose the image quality you wish to use for your images.
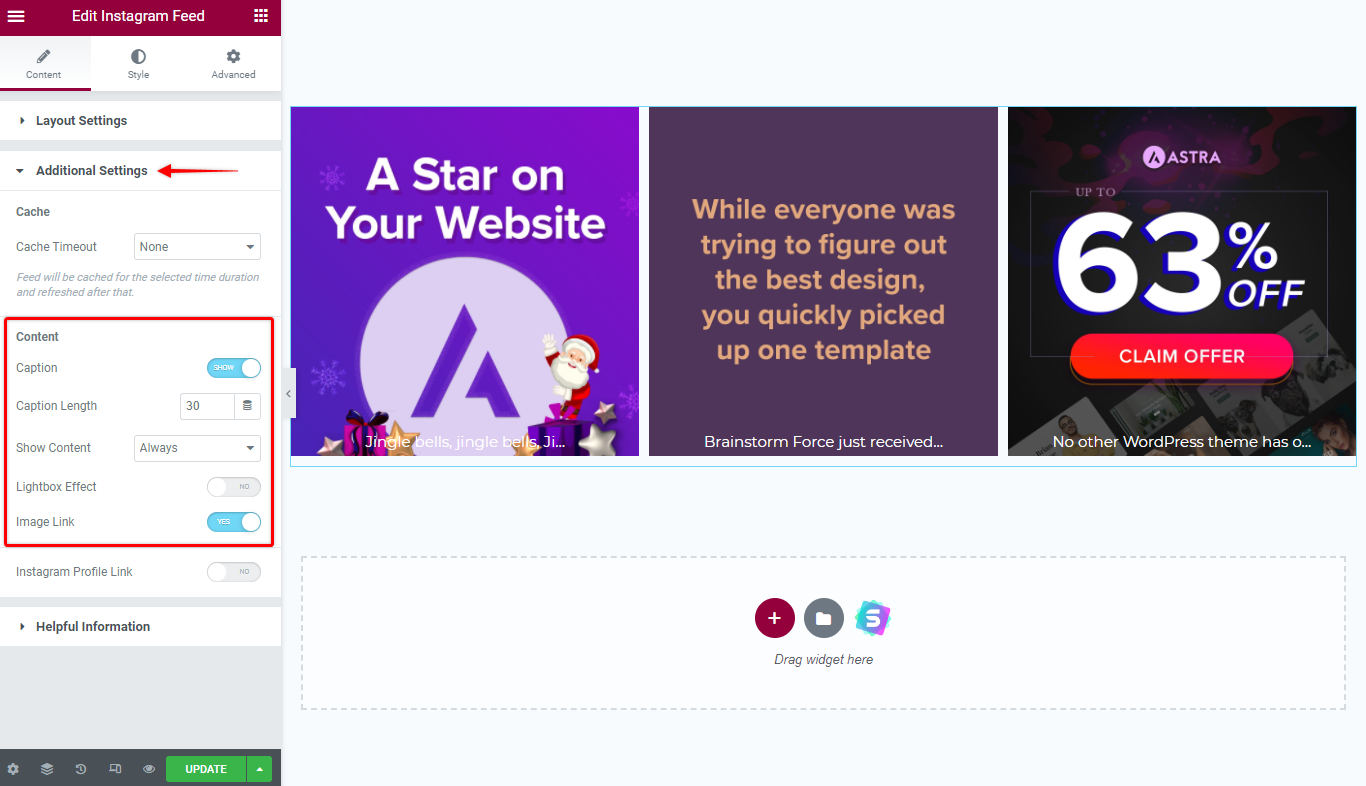
Additional Settings
Step 5 – In addition, you can set the cache duration with the “Cache Time” dropdown. Thus, the value you set here will determine how often is Instagram Feed widget going to refresh your posts;

Step 6 – Also, you can decide how your content will be displayed using Content settings:
- Caption: enable or disable caption set length, and how it should be displayed (Always, On hover, or Below);
- Lightbox effect: enable this option to show your content as a lightbox popup slider on click;
- Image link: add a link to your Instagram posts. Clicking on any image will take the user to that post on your Instagram profile;
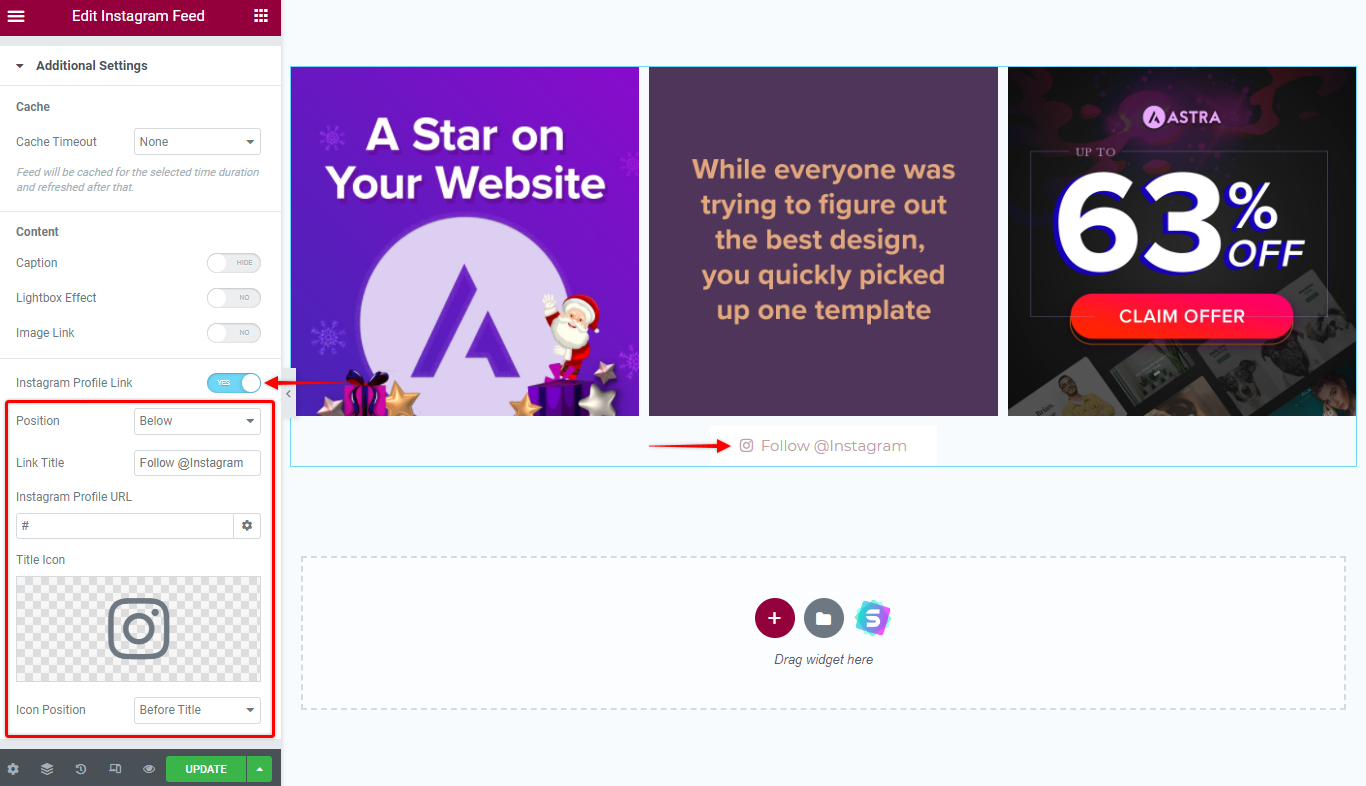
Step 7 – Furthermore, you can enable a link to your Instagram profile. In this case, you will see these settings:
- Position: set link above or below content, or as an overlay;
- Link Title: add custom link title;
- Instagram Profile URL: add Instagram profile URL;
- Title Icon: choose an icon used with the link title;
- Icon Position: position icon before or after the title.
Style Settings
Now that your Instagram Feed content is set, you can switch to the Style tab.
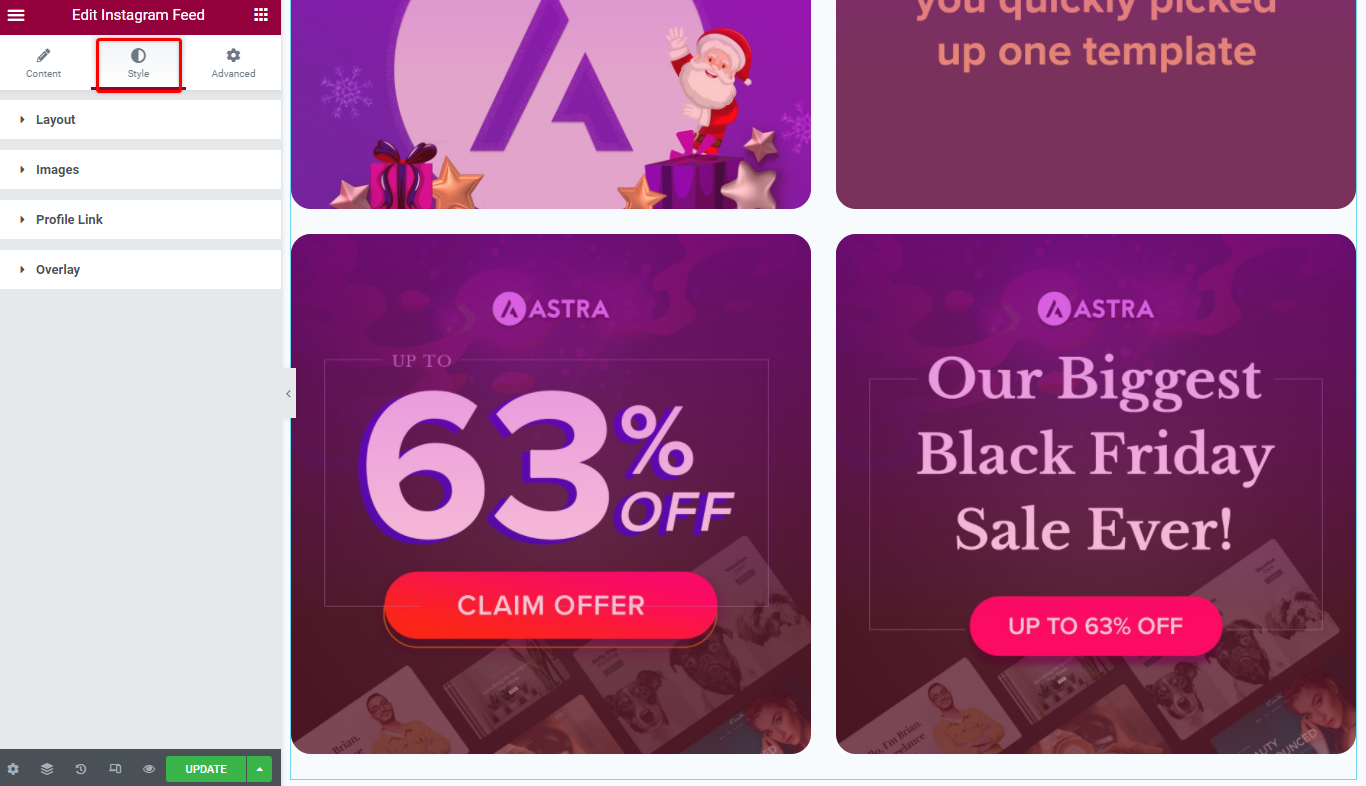
Here, you can add layout and images styling, add an overlay, and modify some additional options:
- Layout: set a gap size between rows and columns;
- Images: set normal and hover image options, turn images to grayscale, and set border and alignment;
- Content: if you enabled “Captions” under Additional Settings, you can set captions typography, color, alignment, and padding;
- Profile Link: if you enabled “Instagram Profile Link” under Additional Settings, you can set link typography, color, alignment, border, padding, and icon spacing;
- Overlay: add an overlay to images, set colors, type, margins, and opacity for both normal and hover states.
FAQs
Was this doc helpful?
What went wrong?
We don't respond to the article feedback, we use it to improve our support content.
On this page