With an abundance of plugins, blocks, themes, and widgets to choose from, building a site that stands out can seem overwhelming.
Luckily, it doesn’t have to be. Thanks to Elementor’s website kits and templates, you can build a beautiful website. You can then customize it using Ultimate Addons for Elementor’s selection of widgets.
Finally, you can translate it all in a flash with WPML’s new Translate Everything mode.
With very little time and effort, you can have an eye-catching, multilingual site up and running in as little as one afternoon!
Why Translate Your Site with WPML?
Translating a website isn’t as complicated as it once was. Advancements in automatic tools have made translating your site quicker and more affordable.
Now, you translate a site in minutes, no matter your budget or time constraints. Plus, there are a lot of great reasons to do so!
By translating your site, you can get a leg up on your competitors by:
- Utilizing multilingual SEO. Google and other search engines will index and rank your translated content. This means you have a better chance of ranking well for all your priority keywords in all languages.
- Reducing abandoned checkout pages. Did you know 76% of customers prefer to purchase products in their own language? WPML’s components let you translate all of your site’s content, including products, checkout pages, and your customers’ shopping carts.
- Winning your clients’ trust. When a client sees you have high-quality content in their language, they feel more confident buying from you and may even recommend your site to others. So, think about also integrating other tools and VoIP phone systems to be in touch with them whenever needed to create more customer loyalty.
With WPML’s Translate Everything mode, accomplishing this is easier than ever. Translate Everything allows you to translate your entire site automatically using Google Translate, Microsoft Azure, or DeepL. This includes posts, pages, products, custom post types, and more!
When the translations are complete, you can choose to review them before publishing or utilize PSD to WordPress developers to manually verify quality.
You can even hire a professional translator to check and make sure everything sounds right and that there are no glaring grammar errors or plagiarized content to be found. Since automatic translations can make your content sound robotic or unnatural, reviewing it with an authentic AI detector helps ensure it reads like human-written text that builds trust with your audience.
Automatic translation is also the most affordable way to translate your site. New WPML accounts include enough automatic translation credits to translate most sites at no additional cost.
Another alternative is using translation management solutions such as Centus, which offers a blend of human and machine translations for enhanced accuracy.
Need to translate more? You’ll never pay more than a fraction of a US cent per word. The more you translate in one month, the cheaper it is.
This means you could have a functional, multilingual site in a matter of minutes. And because WPML stores your translations in your site’s database, you own your translations.
Why Build Your Site with Elementor?
Having high-quality multilingual content on your site is extremely important. But, you also need to display it in an eye-catching way while still being functional.
Elementor (Elementor review) is a leading WordPress page builder. This is because of its easy drag-and-drop functionality and beautiful designs. It allows you to build a professional-looking website even if you have no coding or design experience.
You can add even more functionality by adding widgets from Ultimate Addons for Elementor.
This helps you set it apart from other sites that use Elementor and allows you to add custom-looking elements to your site.
How to Build a Custom Multilingual Site in 7 Steps
The best part about these plugins is how they all work together to build a great site. That’s because Elementor, Ultimate Addons for Elementor, and WPML are all committed to ongoing compatibility. They won’t break your site, and everything is designed to work seamlessly together.
Here’s how to use them together to build a beautiful and functional site in no time:
Step 1. Install Astra Theme
As most web hosts install WordPress for you, let’s skip the initial setup and install the Astra theme. Once done, you’ll have a fully operational website all ready to translate.
- Log into WordPress
- Select Appearance > Themes
- Search for Astra or select it from the Popular tab
- Select Install and then Activate once the option appears
The Astra theme is now ready to go.
Step 2. Choose a Starter Template
The Astra theme comes with over 180 Starter Templates. Each is a fully operational website you can install and customize as you wish.
- Select Appearance > Starter Templates from your WordPress dashboard
- Select Elementor as the page builder and browse the selection of templates
- Select a template and work through the simple setup wizard to get it ready
Step 3. Install Elementor
Elementor is installed automatically with Astra Starter Templates if you select it as your page builder. You can also install it manually if you prefer.
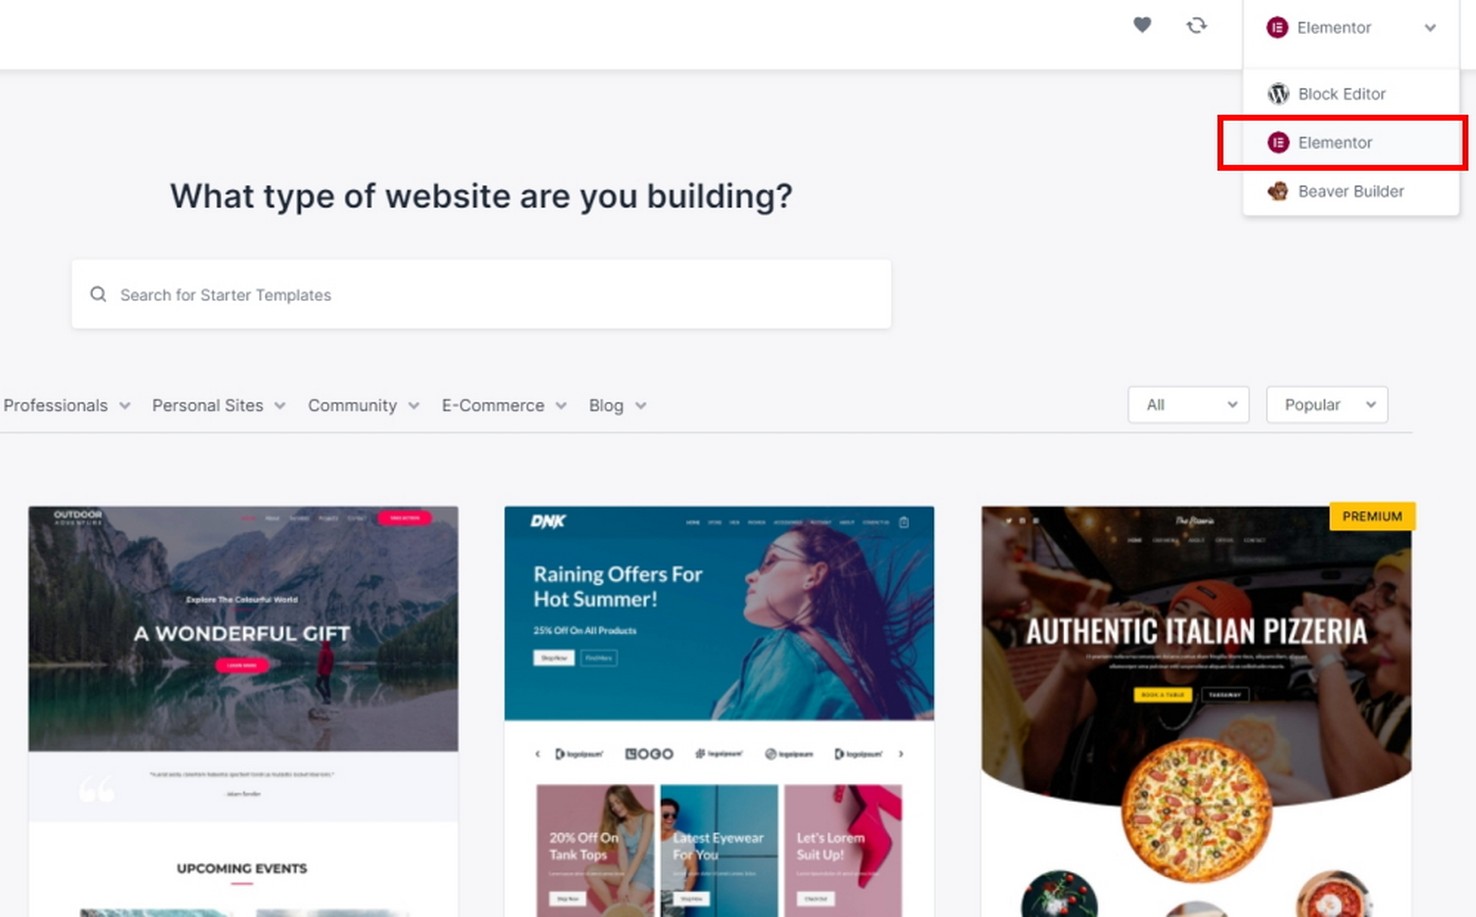
You can download Elementor for free, or upgrade to get more advanced features and templates.
- Log into your site and go to Plugins → Add New to upload it
- Select Install > Activate it when the option appears
Step 4. Customize With Widgets From Ultimate Addons for Elementor
To be able to use Ultimate Addons for Elementor (UAE), we first need to install it.
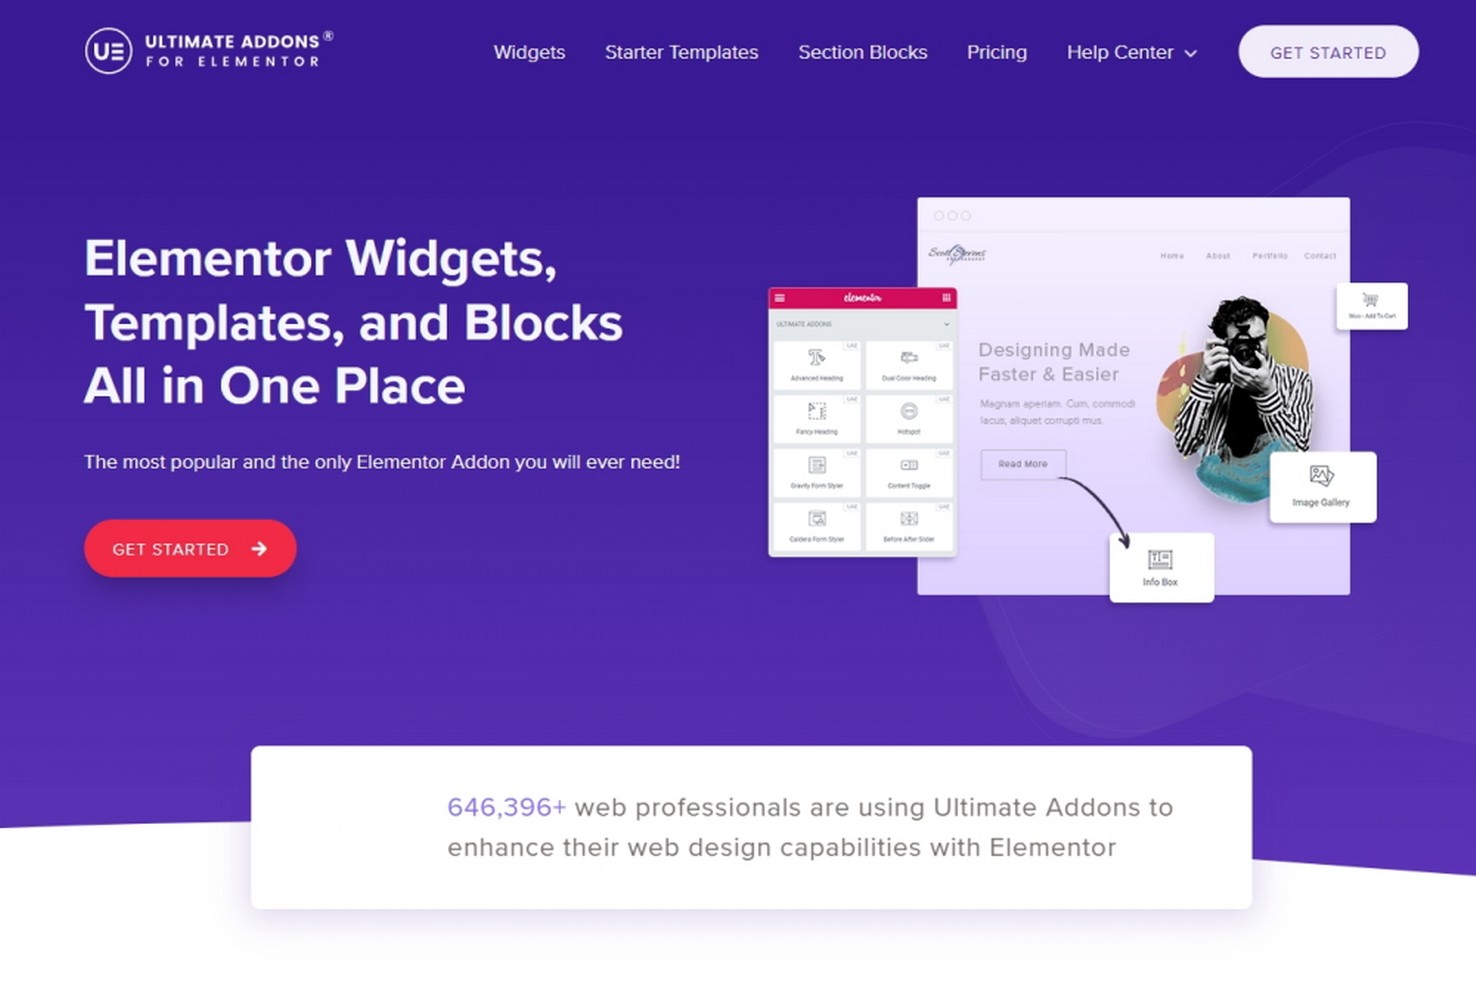
- Visit the Ultimate Addons for Elementor website
- Sign up and pay for the plugin
- Visit Account > Downloads and download the plugin to your computer
- Select Plugins > Add New in your WordPress dashboard
- Select Upload Plugin > Choose File
- Select the .zip file you downloaded and select Install Now
- Select Install and Activate to enable Ultimate Addons for Elementor
After you install and activate Ultimate Addons for Elementor, you have access to dozens of additional widgets and section blocks you can add to your site.
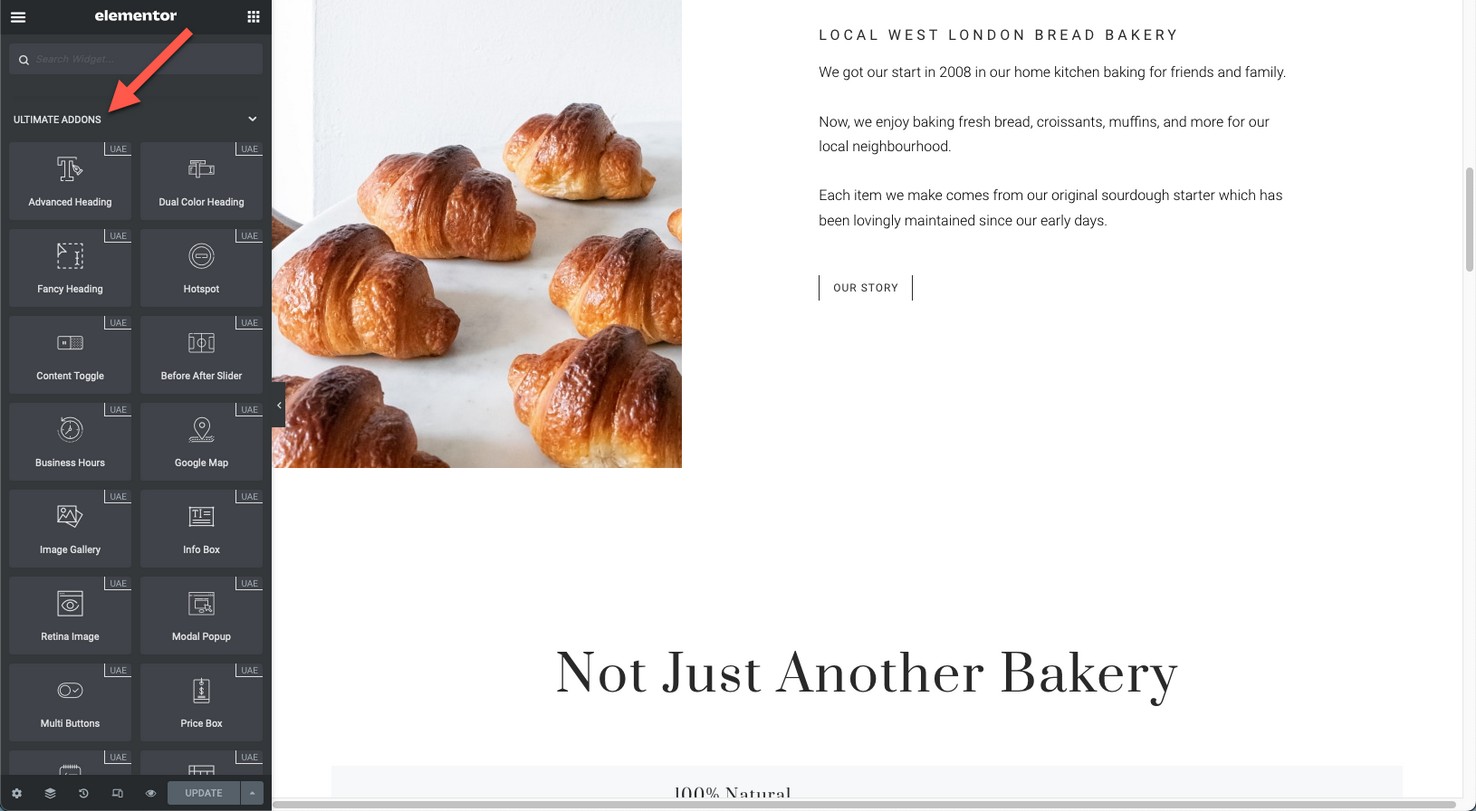
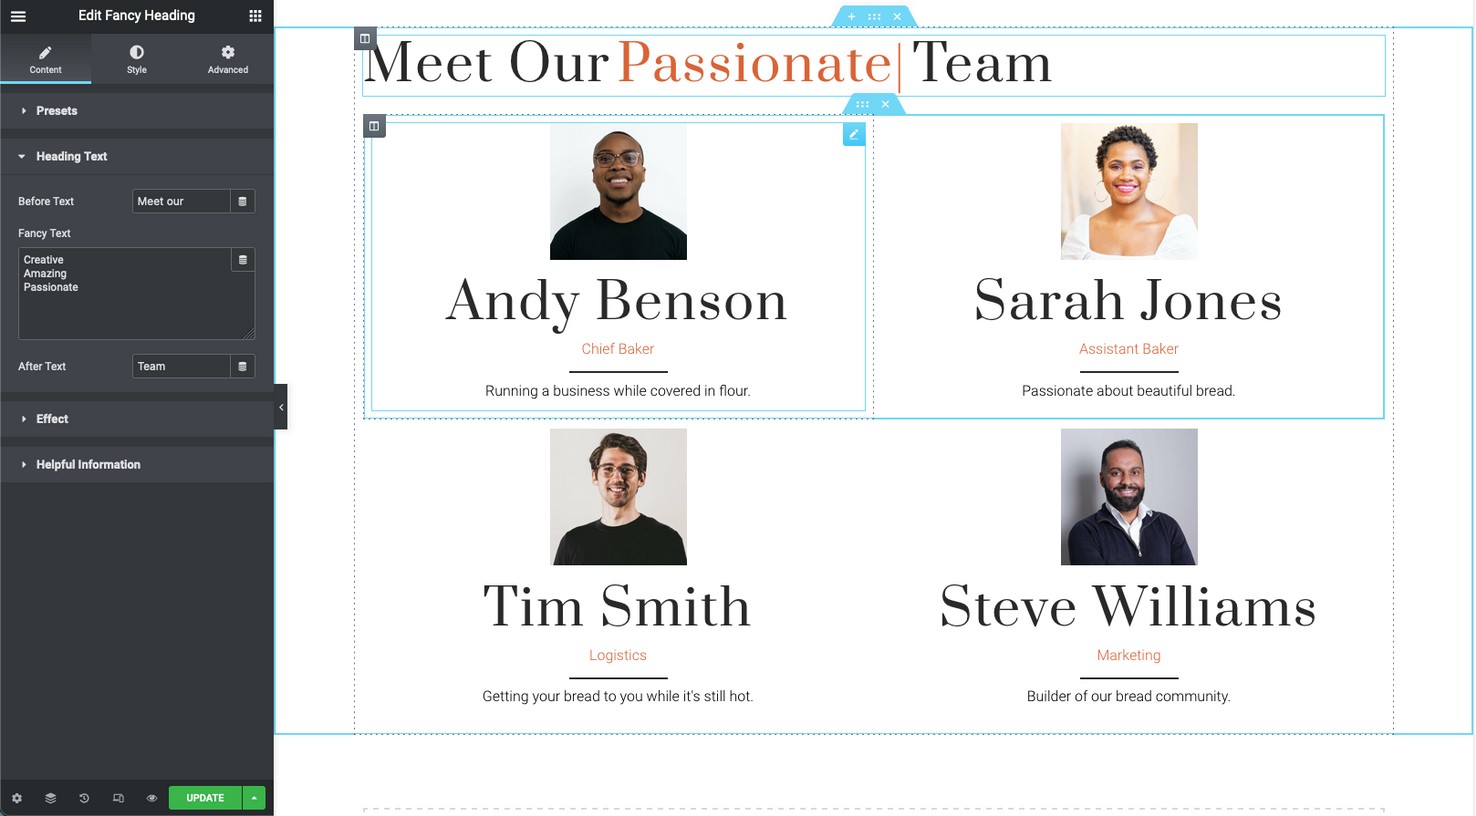
In this example, we added a Fancy Heading widget and created a new section about our team using some Team widgets.
Step 5. Install WPML
Now you have a working WordPress website and some website content in English, let’s translate it.
We would recommend adding your own content before this step to ensure you only need to translate pages once. If you translate before finalizing your content, you’ll be giving yourself twice as much work!
To translate sites that use page builders like Elementor, you’ll need a WPML Multilingual CMS account. This account type also includes automatic translation and enough credits to translate most sites for no extra charge.
From your WPML account, download the OTGS Installer plugin.
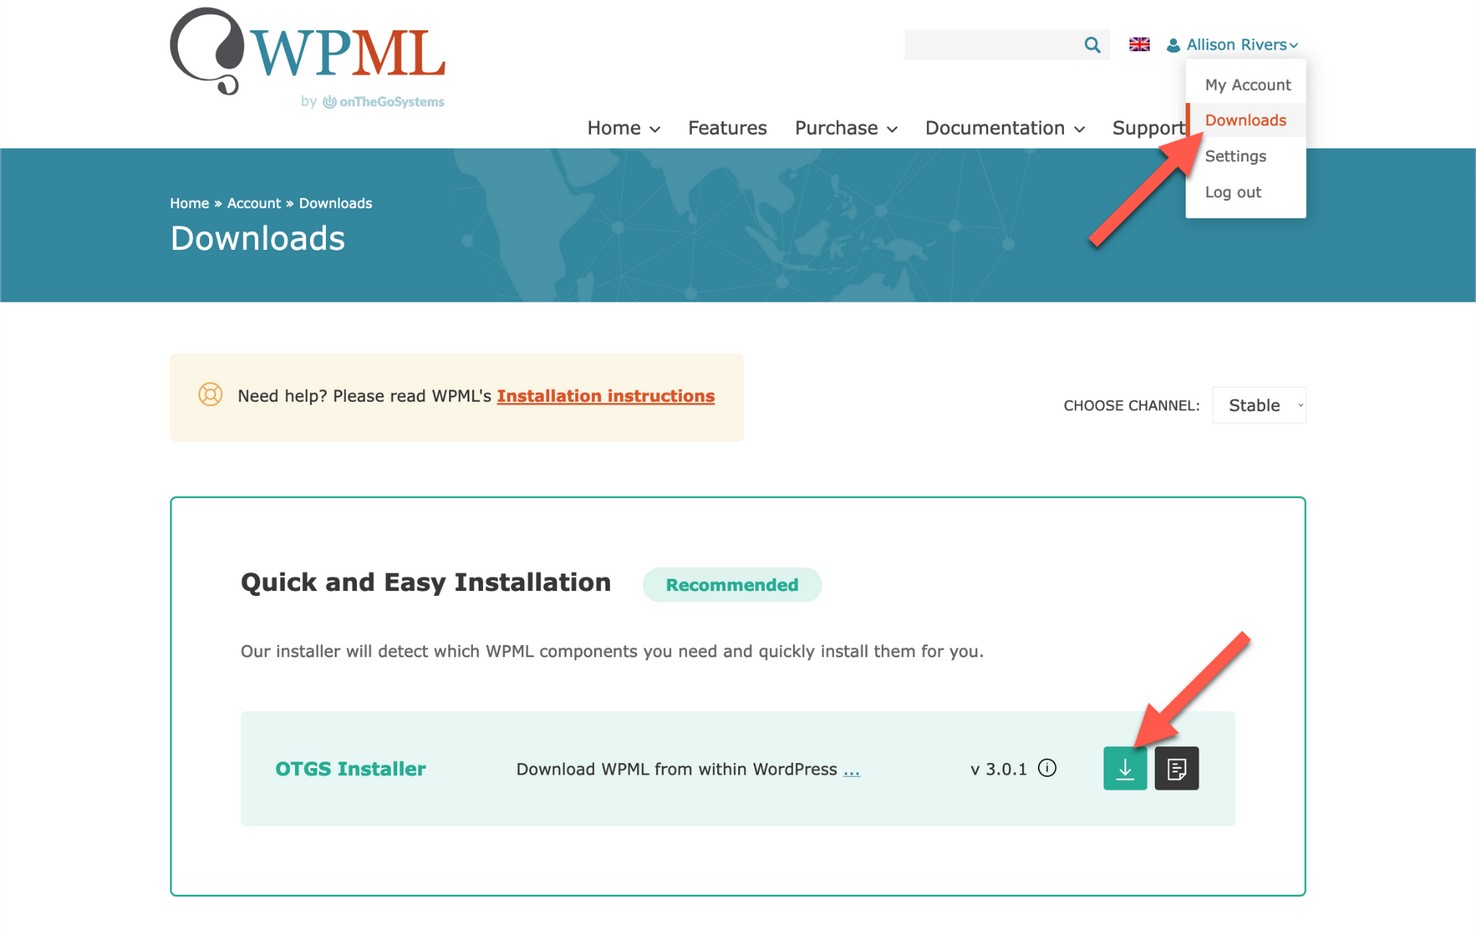
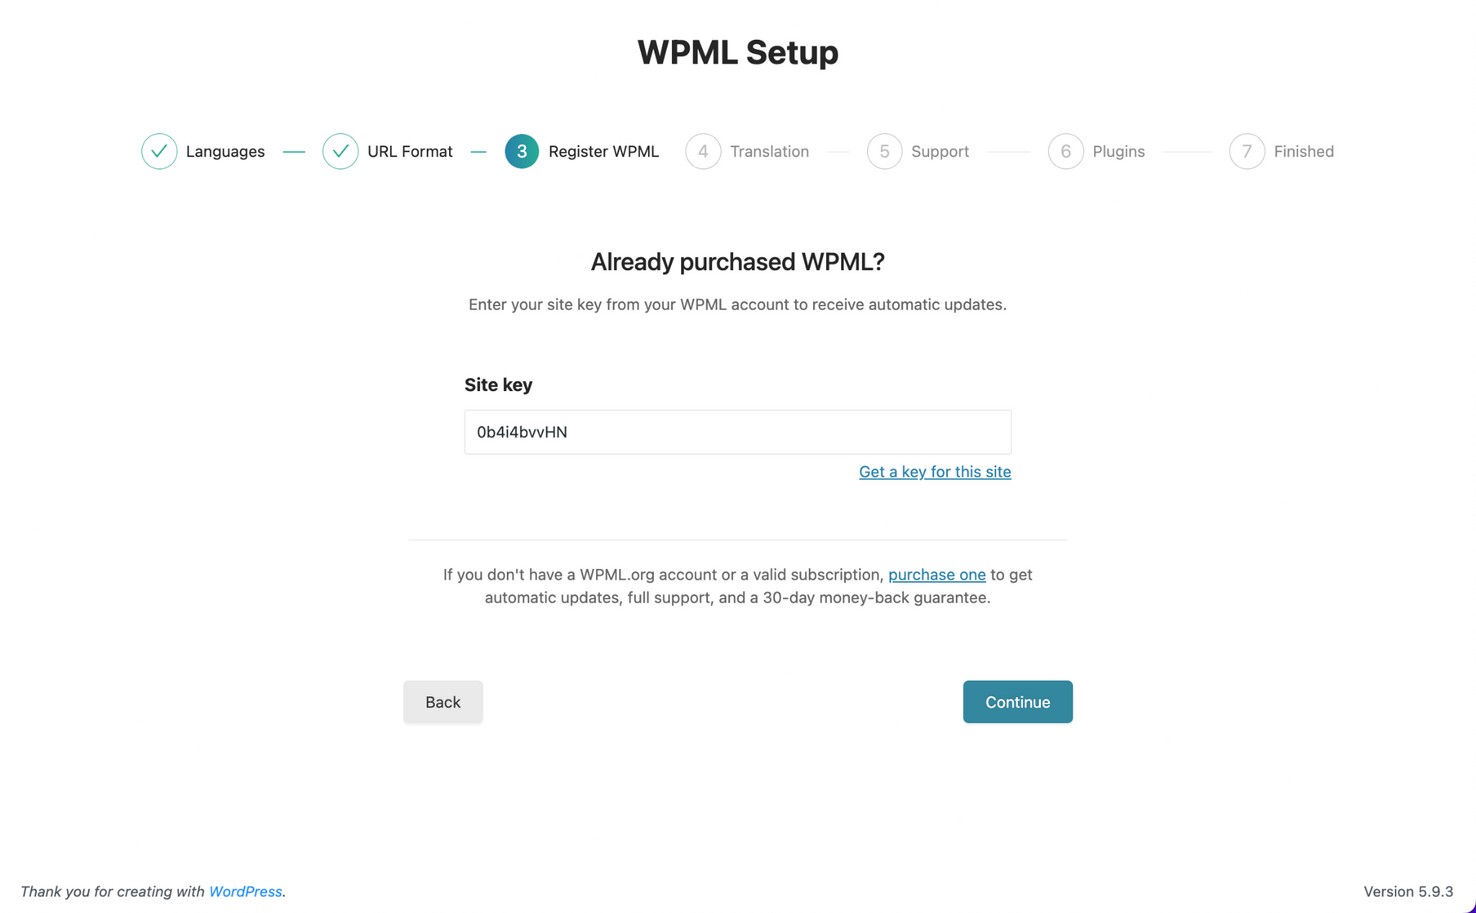
Then, upload it to your site and click Get a key for this site to generate a site key.
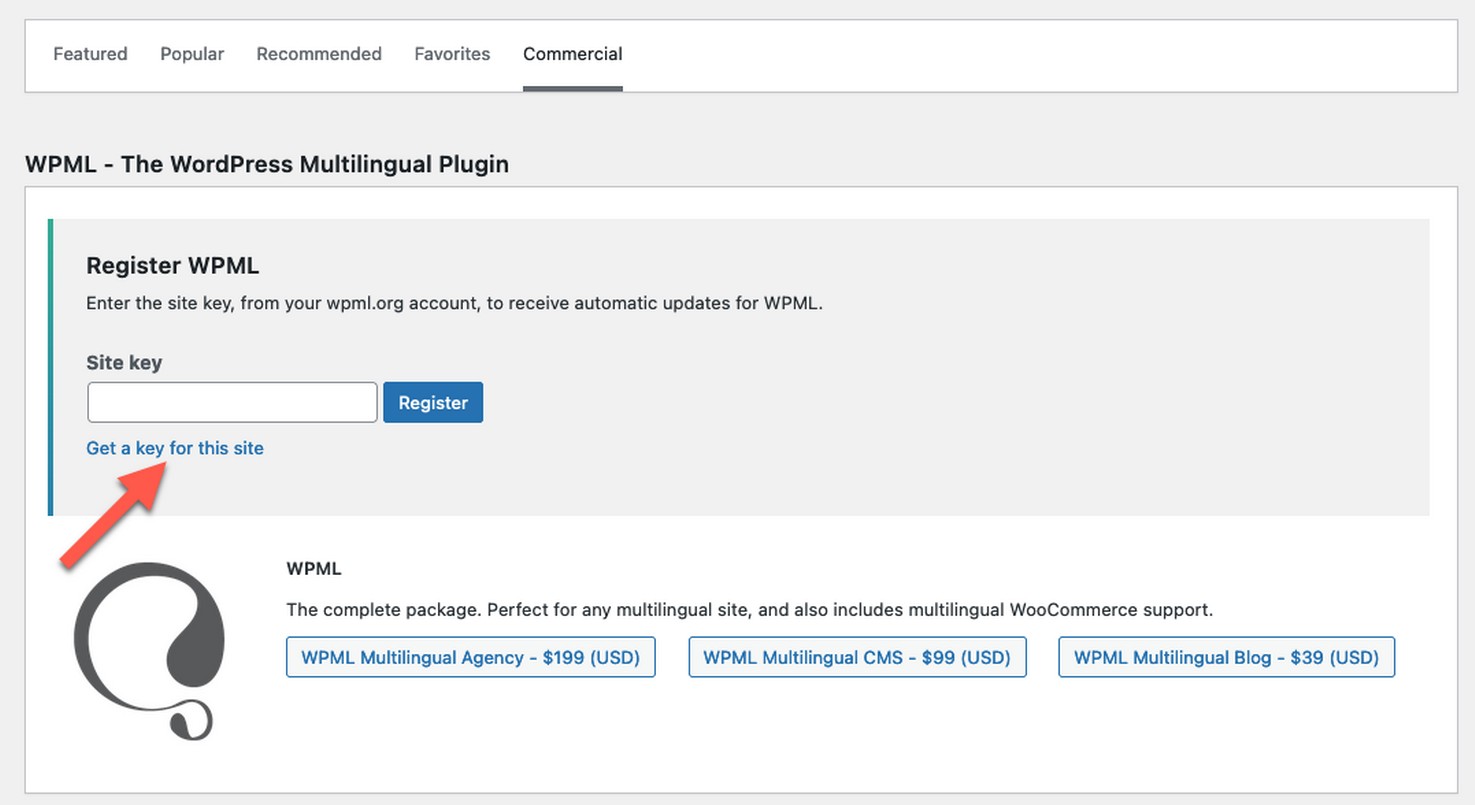
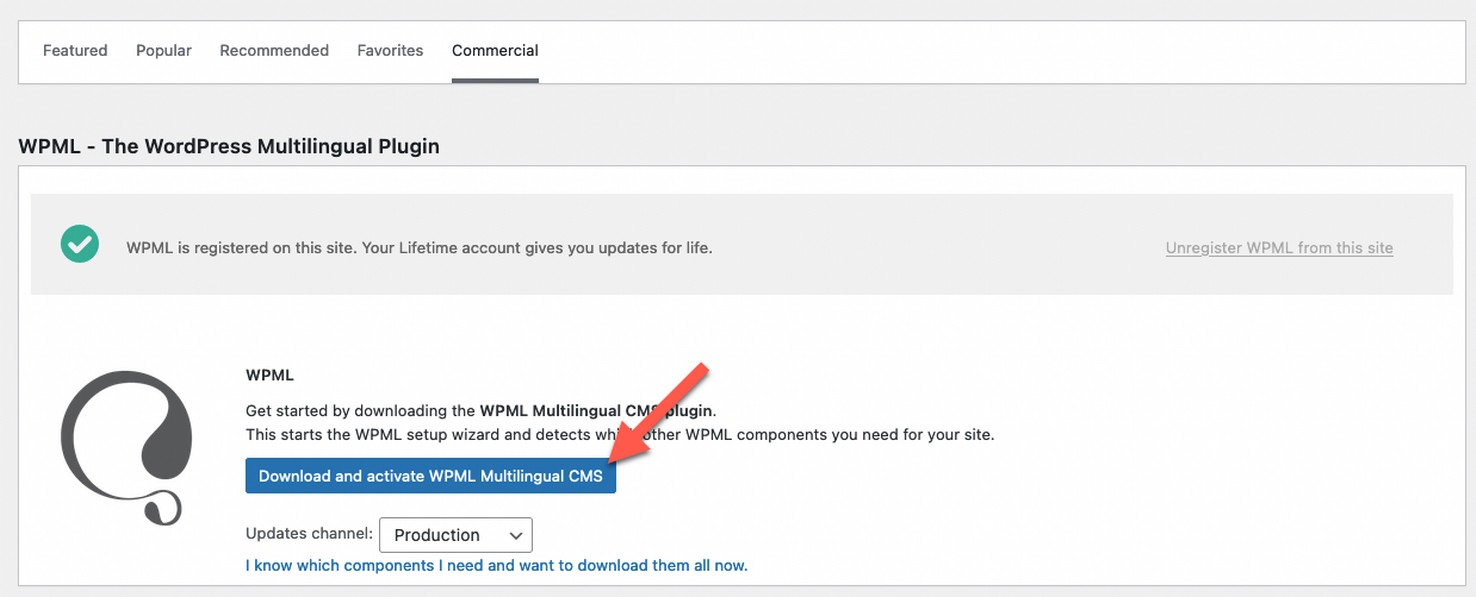
After entering your site key, it prompts you to download and activate the WPML Multilingual CMS plugin.
Step 6. Choose the Translate Everything Mode
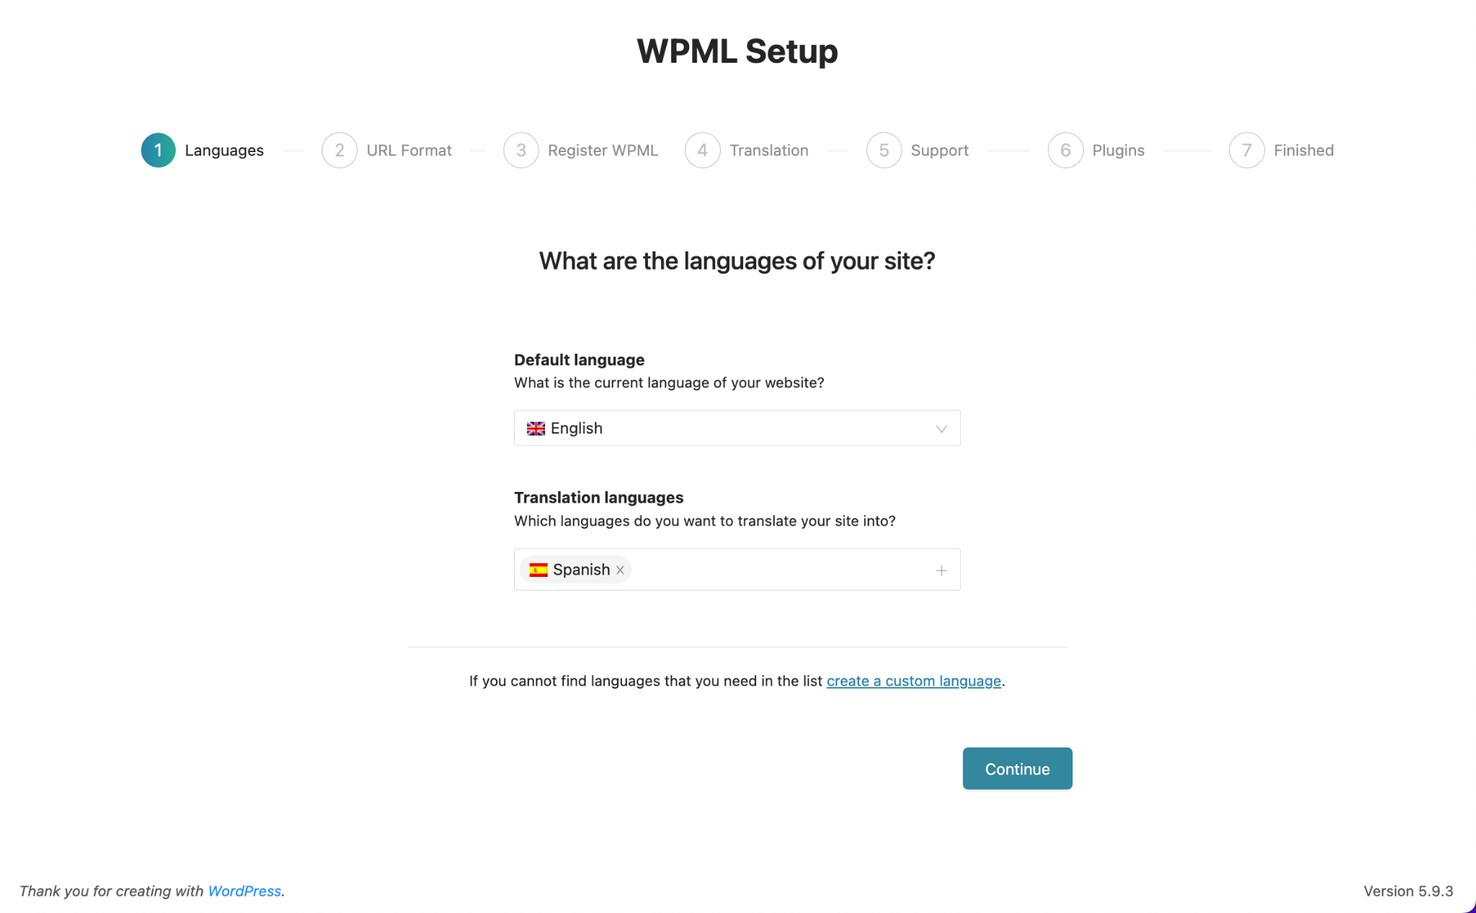
Once you install and activate the Multilingual CMS plugin, the WPML setup wizard starts automatically.
First, choose your site’s languages.
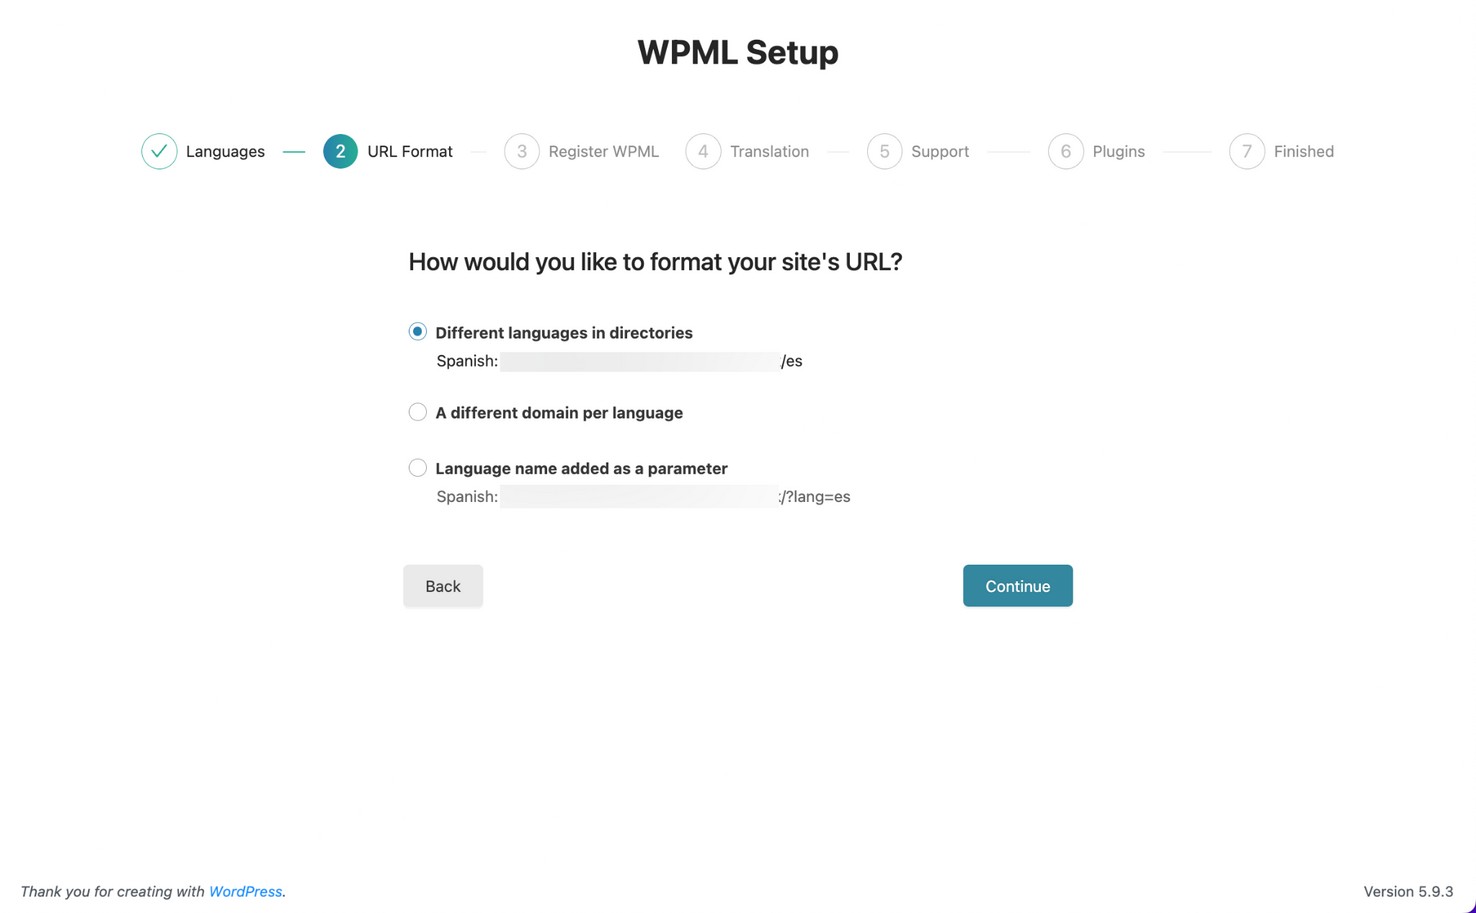
Next, choose how you want to format your URL for your translated content.
Add your site key. This should already be filled in from earlier. If not, click Get a key for this site to generate a site key.
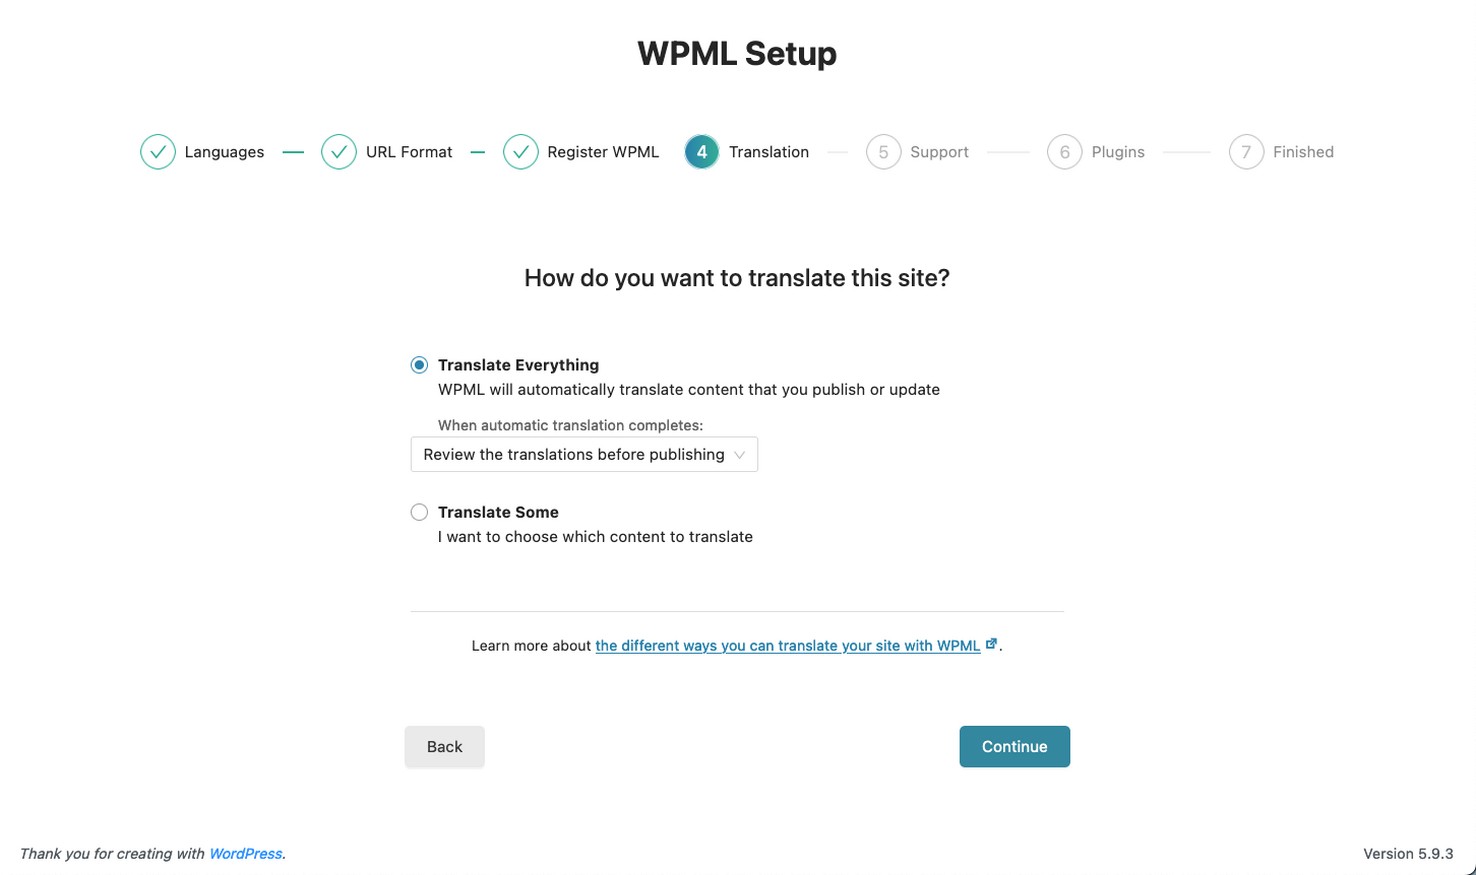
When it comes to choosing your translation mode, you have two options.
- Translate Some allows you to choose what you want to translate
- Translate Everything automatically translates your whole site
For this example, we’ll choose to Translate Everything and review our translations before publishing.
You can choose to share your plugin and theme information with WPML for better support. Finally, WPML suggests activating additional components based on your site’s content and other plugins.
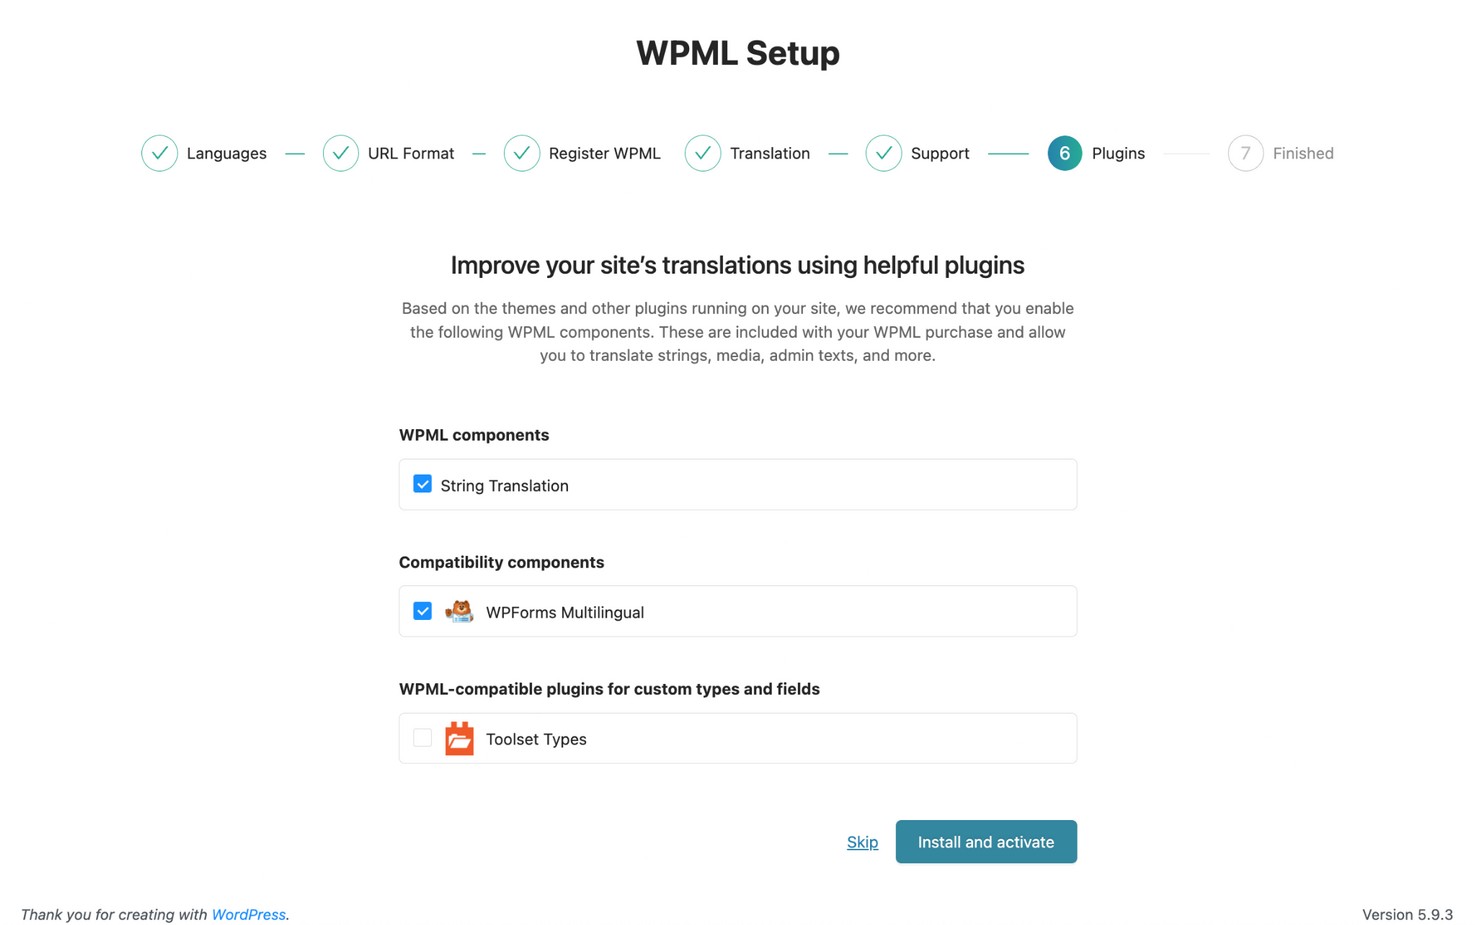
As soon as you finish the setup wizard, WPML starts translating your site!
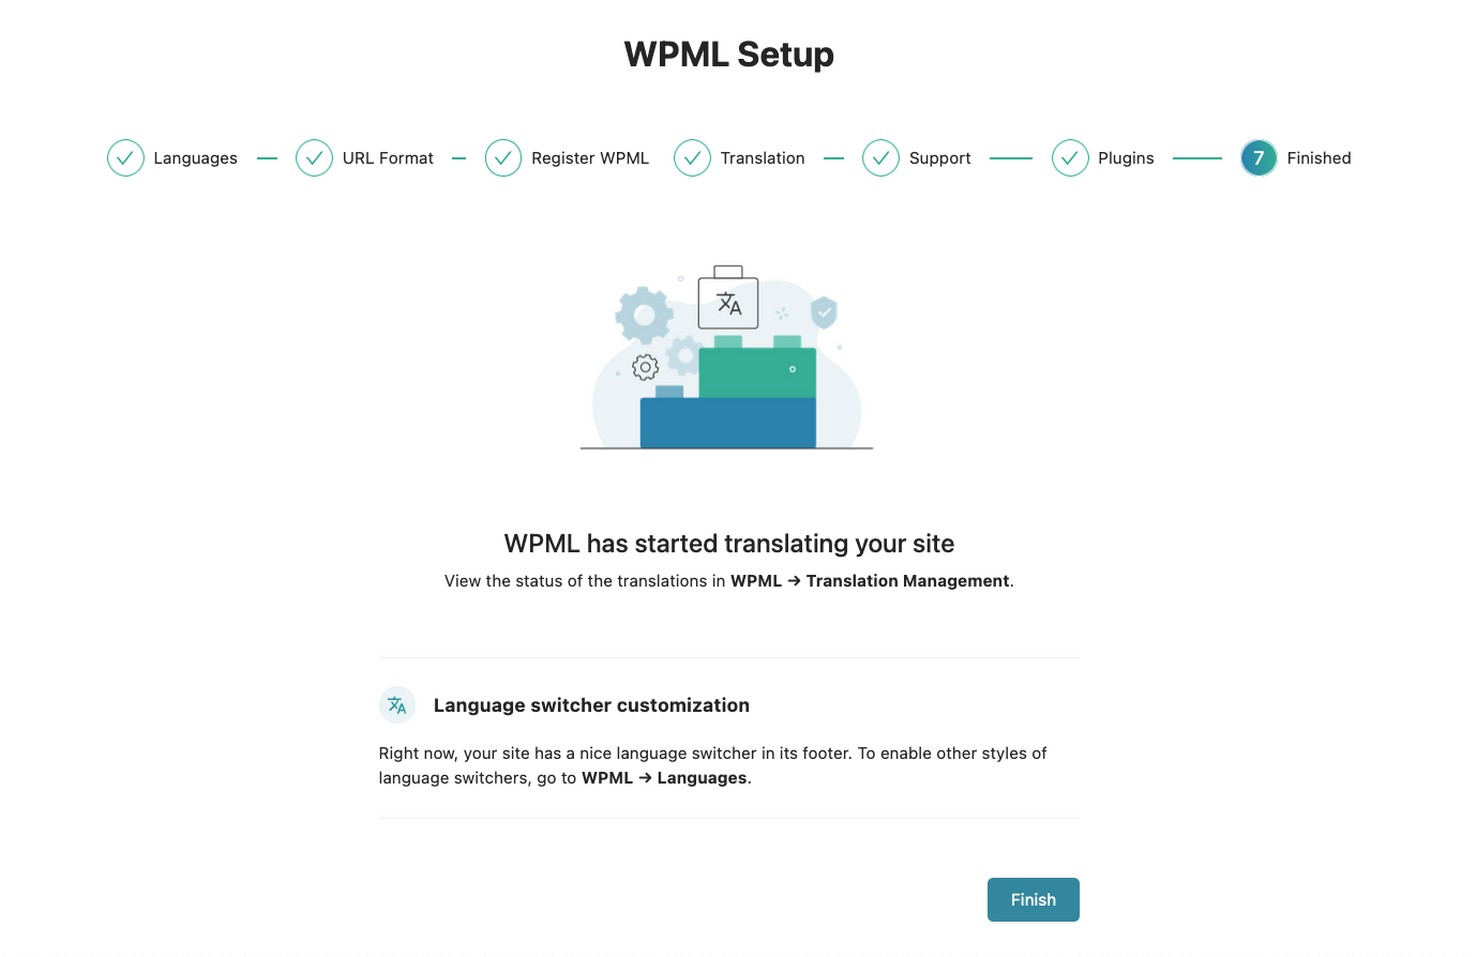
Step 7. Review Your Translated Site
Once WPML finishes translating your site, you can check out your translations.
If you choose to review your translations when you set up WPML, you can go to WPML → Translations and click Review.
This shows the translated pages on your site front end and gives you the option to approve or edit the translation. After approving the translation, it proceeds to the next one.
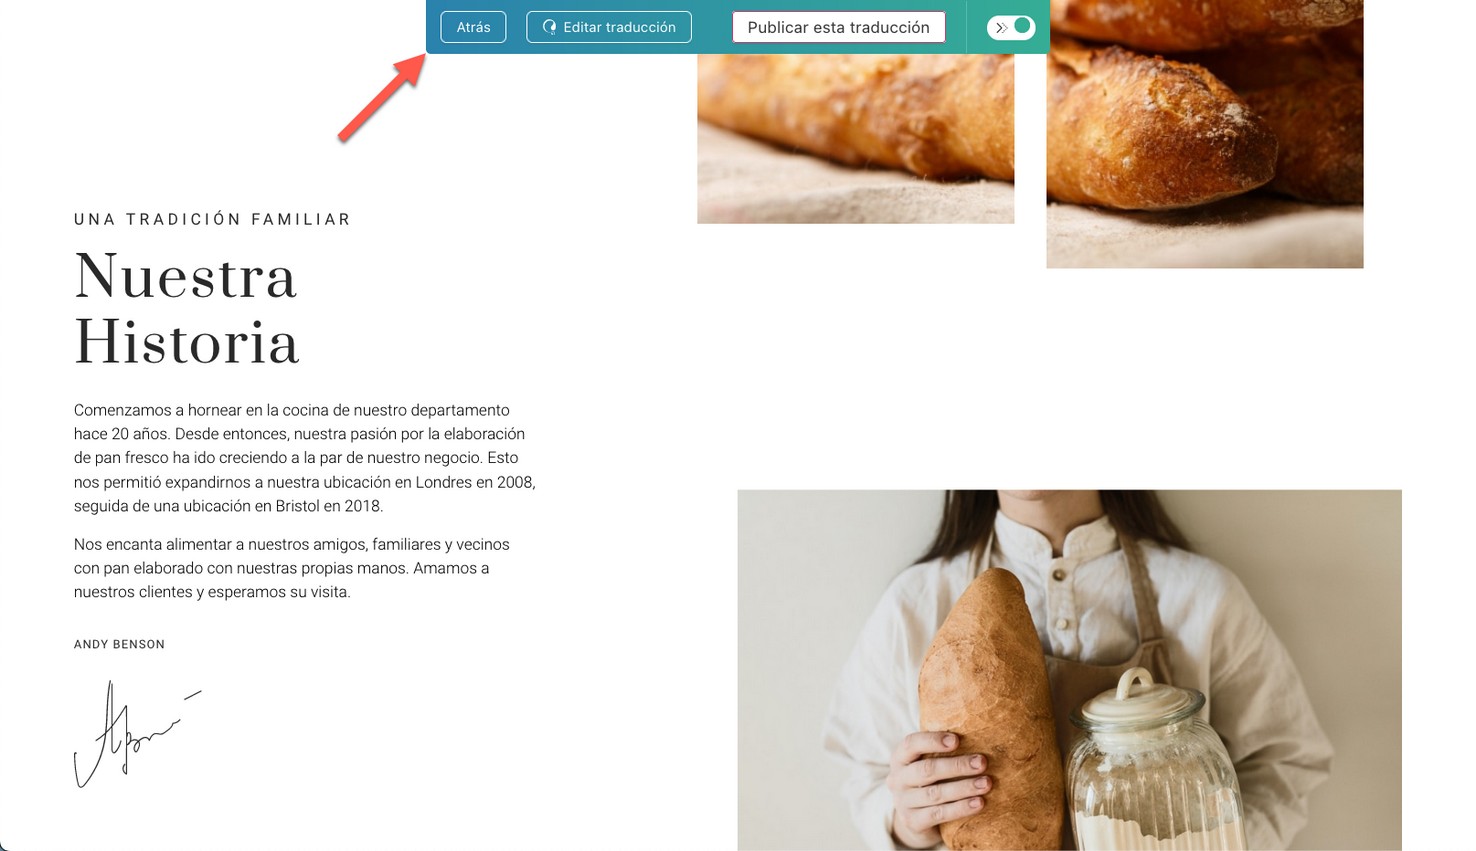
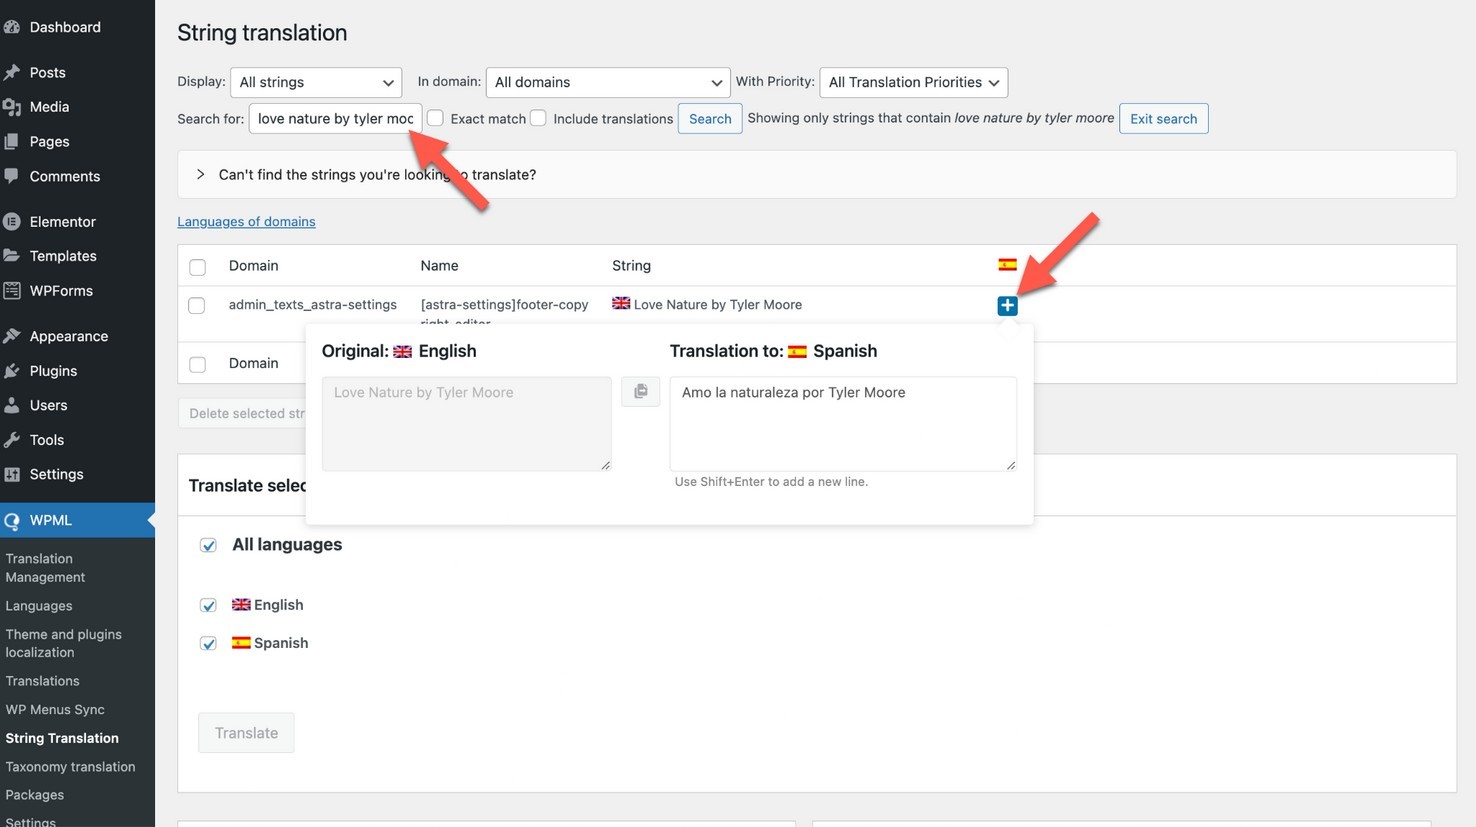
There may be a few lines on your site that haven’t been translated, such as your site’s tagline or copyright information.
That’s because automatic translation often doesn’t have enough context to translate these small strings correctly. You can easily translate these using WPML’s String Translation.
Go to WPML → Theme and Plugins Localization to scan your themes and plugins for strings.
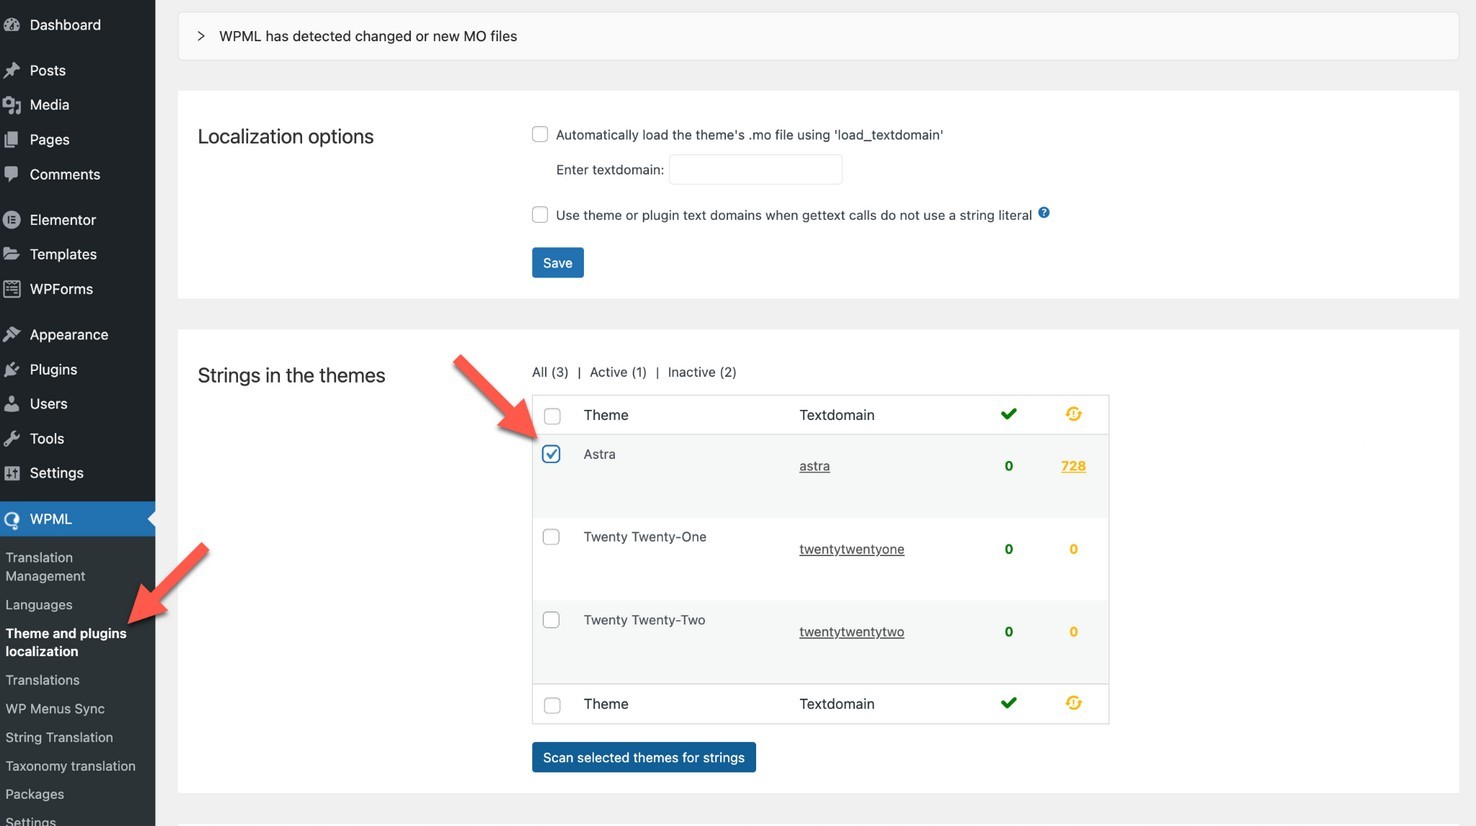
Go to WPML → String Translation and search for the text you want to translate. Click the plus icon to add your translation.
Wrapping Up
That’s it! You now have a fully-translated, beautifully-designed, and customized website using only three plugins: Astra Starter Templates, Elementor, and WPML.
These three plugins work together seamlessly to help you get an international business off the ground with a professional. It’s not even necessary to have any coding or design skills!
Which languages would you translate your site into to grow your business? Let us know in the comments below!


