- Getting Started with Ultimate Addons for Elementor
- Getting Started with Ultimate Addons for Elementor Pro
- How To Install The Ultimate Addons For Elementor Pro Plugin?
- How to Get License Key of Ultimate Addons for Elementor?
- Activate Ultimate Addons for Elementor Pro License
- How Can I Upgrade the License?
- How to Update Ultimate Addons for Elementor Plugin?
- How to update any plugin manually through FTP?
- About Beta Versions
- About Beta Versions
- How to Enable / Disable Widgets in UAE to Reduce Server Requests?
- How to White Label UAE?
- Getting Started with Ultimate Addons for Elementor Pro
- UAE Saved Sections
- How to create Google API key in Google Maps Widget of UAE?
- White Screen /500 Error After Plugin Installation
- How to Increase the Memory Limit of your site?
- Unable to see the Font Awesome 5 Icons in UAE’s widgets?
- Introducing User Registration Form Widget
- How to Create a User Registration Form using Elementor?
- How to Create a User Registration Form with Only Email Field in Elementor?
- Frequently Asked Questions about User Registration Forms
- Google reCAPTCHA v3 in User Registration Form for Elementor
- Honeypot field in User Registration Form for Elementor
- Filters/Actions for User Registration Form Widget
- How to Open a Modal Popup on the Click of an Elementor Widget?
- Modal Popup Widget
- How to Trigger a Modal Popup on the Click of a Menu Element?
- How To Close a Modal Popup on the Click of a Button or Text?
- How to Insert a Video in the UAE Modal Popup?
- What are the Various Options to Close a Modal Popup in UAE?
- How to Display a Modal Popup on Exit Intent?
- Modal Popup JS Triggers
- Woo – Products Widget
- How to display exact WooCommerce product with Query Builder?
- How to set Grid and Carousel layout for WooCommerce products?
- Filters/Actions for WooCommerce Products
- How to enable Quick View for WooCommerce Products?
- How to Exclude WooCommerce Products with Woo-Products Widget?
- How to Set Featured Products in WooCommerce?
- Woo – Products Carousel Does Not Display Correctly?
- How to Display Related Products with Woo-Products Widget?
- How To Add Rows And Columns to the Table?
- Table Widget
- How to add Table Header with Table Widget?
- How to add Table Content with Table Widget?
- How to add Sortable and Searchable Table? How to Show Entries Dropdown?
- How to Merge Columns and Rows in Table?
- How to Style the Table?
- Create Table by Uploading CSV
- Facing Issues with CSV Import?
- Image Gallery Widget
- How to Set Categories for Images?
- How to Add an Image Caption
- How to Set a Custom Link for the Image?
- How to Design Filterable Image Gallery?
- How to Open a Webpage with the Click of an Image?
- How to Set Scale, Opacity, Effects, Overlay Color for Images?
- How to Display Specific Category Tab as a Default on Page Load?
- How to Set Icon on Image Hover?
- Video Gallery Widget
- How to Set Categories for Videos?
- How to Design Filterable Video Gallery?
- How to Display Specific Video Category Tab as a Default on Page Load?
- How to Set a Custom Placeholder Image for the Video?
- How to Set Overlay Color on the Video Thumbnail on Mouse Hover?
- How to Show Video Caption on Hover?
- How to Show Video Category on Hover?
- Bulk Editing for Video Category Names
- How to Style Particular Item / Icon?
- Timeline Widget
- How to Change the Vertical Position of Arrow & Icon?
- How to Set On-Scroll Color for Connector Line and Icon?
- How to Set the Alternate Alignment for the Card Content?
- How to Manage Timeline on Responsive View?
- How Query Builder Works for Post Timeline?
- How to Set Post as Sticky?
- Enable Infinite Load Pagination for Post Timeline
- Posts Widget
- How Query Builder Works for Posts Widget?
- How to Enable Infinite Load Pagination for Posts?
- Filters/Actions for Posts Widget
- Filterable Tabs for Posts Widget
- Layouts for Posts Widget
- Posts Widget Carousel Does Not Display Correctly?
- Displaying Portfolios in UAE Post Widget Using Custom Filters
Types of Timers in Countdown Timer widget
The Countdown Timer widget provides three types of Timers –
These timers can be used based on your requirement and the offers being offered on your site.
Let’s see each Type of timer and an example where it can be used.
Fixed Timer
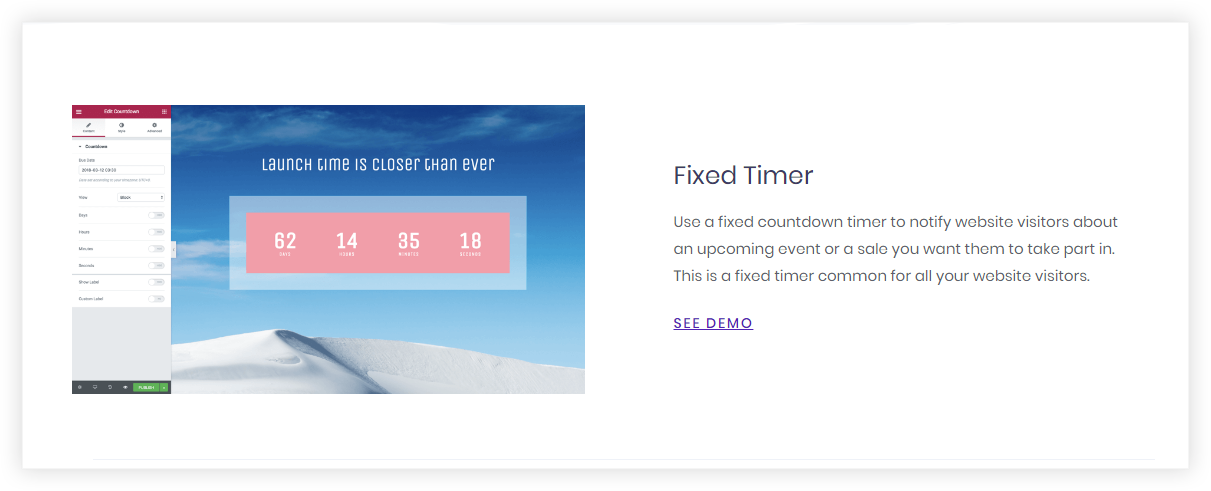
A fixed countdown timer is used to display the amount of time, with respect to years, months, days, etc. This can be used to create a feeling of anticipation. Use this countdown to announce offers or an event on a specific day and display the time left for it to begin.
If you are planning an offer for any of the upcoming events like Black Friday, Cyber Monday, Christmas or New Year, a fixed countdown timer is what you’ll need.
Here are the steps on how to set it up –
- Step 1: Select Fixed Timer for the Type of Countdown Timer in the Content > General
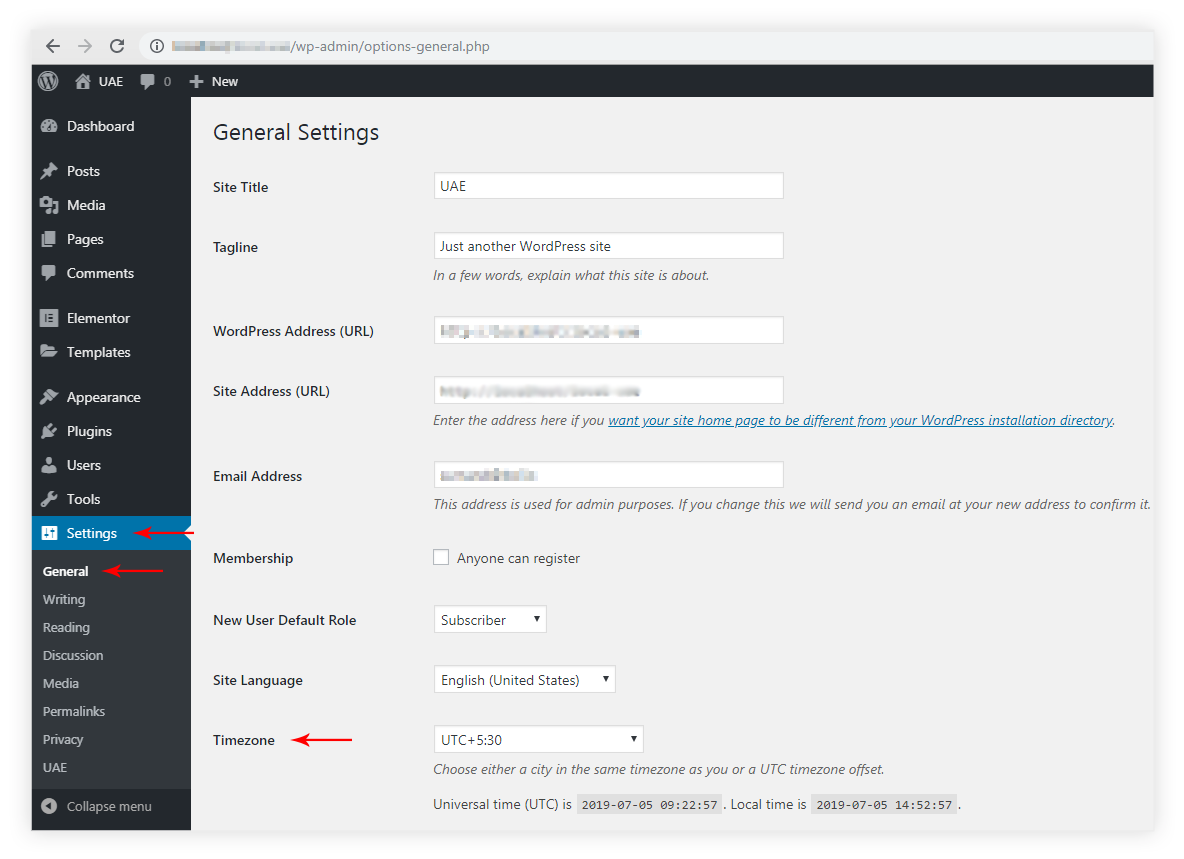
- Step 2: Now, add a Due Date and Time, when you want the timer to expire on the specific Date and Time Note: By default, if you have not set any Timezone for the WordPress site you will see a message which mentions you are setting time in UTC 0. Make sure you set your timezone from the WordPress Backend, this will allow adding time and Date based on your timezone.
- Step 3: Choose the Action you want to execute after the timer goes off as per the Due Date and Time or expires.
- Step 4: Style your Timer items from the Style tab under the Layout field, from the Square, Circle, Rounded Styles. Manage the distance between the digits and also between digits and labels. You also have the option to Style your Expiry message using the Typography fields.
Evergreen Timer
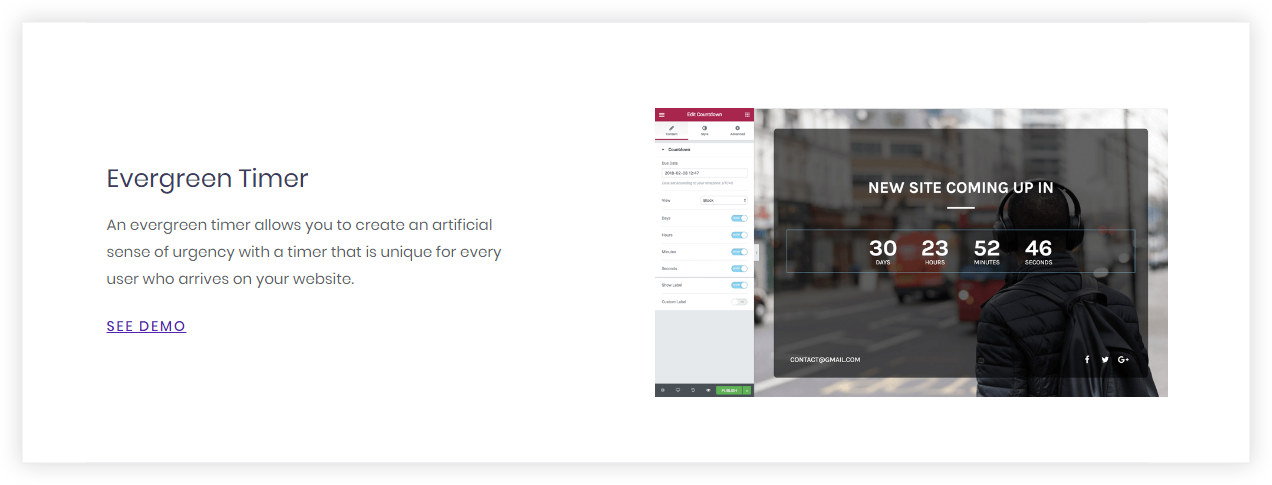
An evergreen countdown timer is used to display the amount of time a particular user has to avail the offer. This is a great way to create a feeling of scarcity, urgency, and exclusivity.
Use this countdown to display some special offers to users who have arrived on your website, asking them to avail the offer within the specified time. This countdown timer sets cookies making sure that the offer looks exclusive and scarce.
- Step 1: Select Evergreen Timer for the Type of Countdown Timer in the Content > General
- Step 2: Now, under the same section you will need to add Days, Hours, Minutes. This time will be the same for every user who visits your site. And it will be tracked by storing cookies on his site. So if in case, if an X User sees a timer on visiting page of 30 minutes and visits later after 10 minutes he will see only 20 minutes remaining. But if Y user visits the same page he will see a Countdown Timer of 30 minutes for this page. Which means for every new user a cookie is stored on his site and the countdown is displayed accordingly.
- Step 3: Choose the Action you want to execute after the timer goes off as per the Due Date and Time or expires.
- Step 4: Style your Timer items from the Style tab under the Layout field, from the Square, Circle, Rounded Styles. Manage the distance between the digits and also between digits and labels. You also have the option to Style your Expiry message using the Typography fields.
Recurring Timer
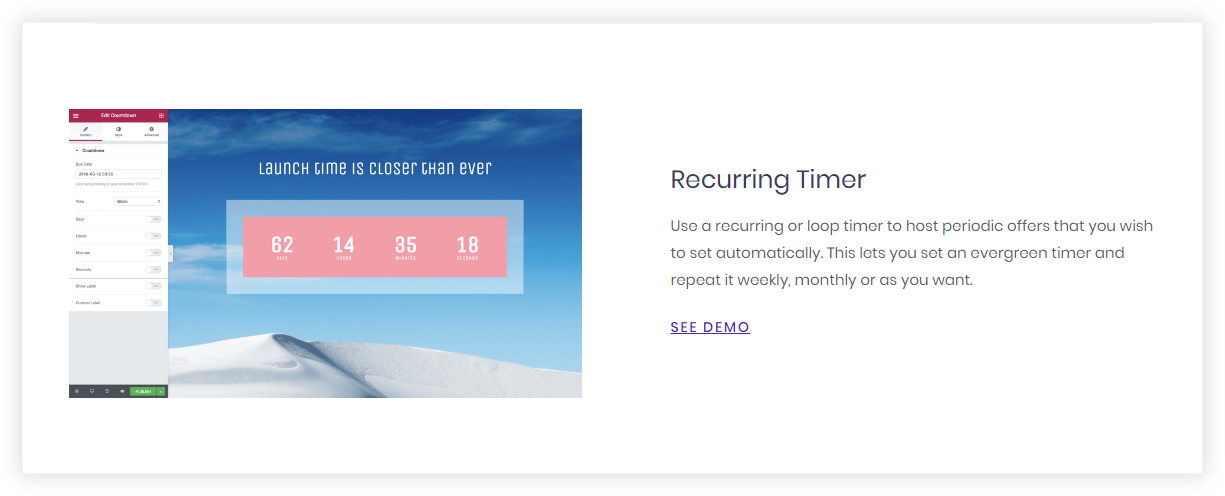
A recurring timer is a timer that can be displayed on a specific date and time and after its expiry, it can be displayed after certain intervals of days or even months. This can be used to display an offer just like the Fixed timer but here you would not require to set the timer for that event again in a month, after few days or even a year.
Let’s say you have an event every year which provides huge discounts and offers on your products. For this event, you can set a Recurring Timer which will be triggered every year or after every predefined month. And it also has an option to set until when this Timer will last and chose an action after expiry.
- Step 1: Select Recurring Timer for the Type of Countdown Timer in the Content > General
- Step 2: Now, add a Start Date and Time, when you want the timer to begin on the specific Date and Time
- Step 3: Below Start Date and Time field, you will find the option to set the Days, Hours, Minutes fields. This option will set an amount of time for which the Timer will display after the timer starts.
- Step 4: Now the important field i.e. Repeat Timer after (Days) which will make the Countdown Timer recur after the specific days
- Step 5: Choose the Action you want to execute after the timer goes off after the Timer expires.
- Step 6: Style your Timer items from the Style tab under the Layout field, from the Square, Circle, Rounded Styles. Manage the distance between the digits and also between digits and labels. You also have the option to Style your Expiry message using the Typography fields.
We don't respond to the article feedback, we use it to improve our support content.