Did you ever need to limit your sales to specific countries? Or do you need to display different content depending on user location? Since UAE version 1.35.1, you can add conditions to display content based on geolocation.
To discover the user location (country), UAE Display Conditions uses MaxMind Geolocation integration.
Thus, this document will show you how to set up the MaxMind and UAE Display Conditions to work together. Further, we’ll show you how to display or hide the sections, columns, or widgets for users, depending on their location.
UAE Display Conditions
UAE Display Conditions are available for all Elementor widgets, including any third-party addons.
Since Display Conditions is an extension for UAE and Elementor, you will need to activate it first. Please follow these instructions:
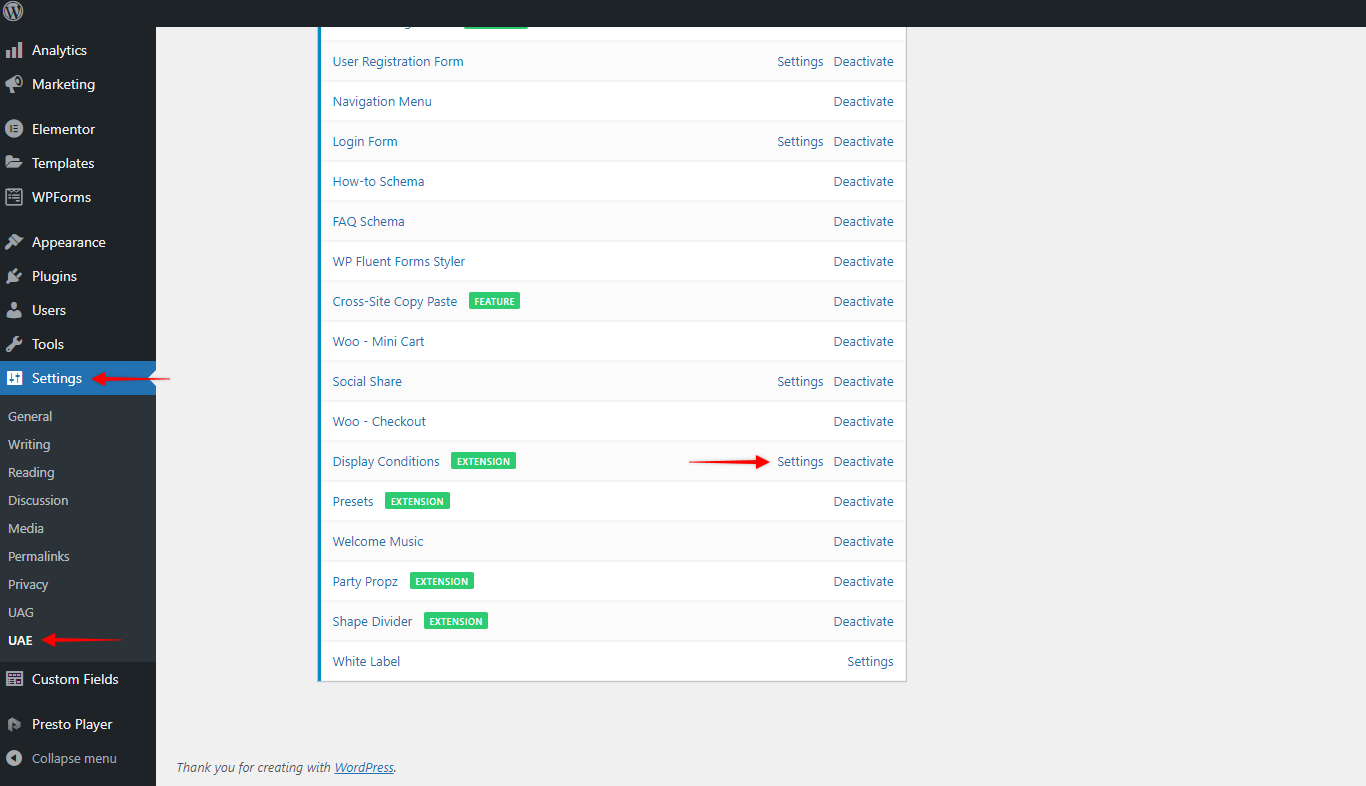
Step 1 – Login to your website and navigate to Dashboard > Settings > UAE;
Step 2 – Scroll down the Widget list to find “Display Conditions” and click on “Activate”
Once the extension is activated, this option will be available for any Elementor widget, section, or column.
You can find more information on conditions and extensions in the Display Conditions document.
Geolocation Condition
The Geolocation Condition allows you to set display conditions based on the country where the user is located. For example, this way you can display different products or pricelists for different countries. Also, you could hide some content in case that you provide services in a limited number of countries.
To use Geolocation conditions, you will need to configure the MaxMind license key first.
MaxMind Geolocation Integration setup
Since Geolocation requires the MaxMind license, you will need to create a MaxMind account and create your license.
Create MaxMind Account
You can create the MaxMind account following these steps:
Step 1 – Visit the GeoLite2 Sign Up page on the MaxMind website to create a MaxMind Geolocation account;
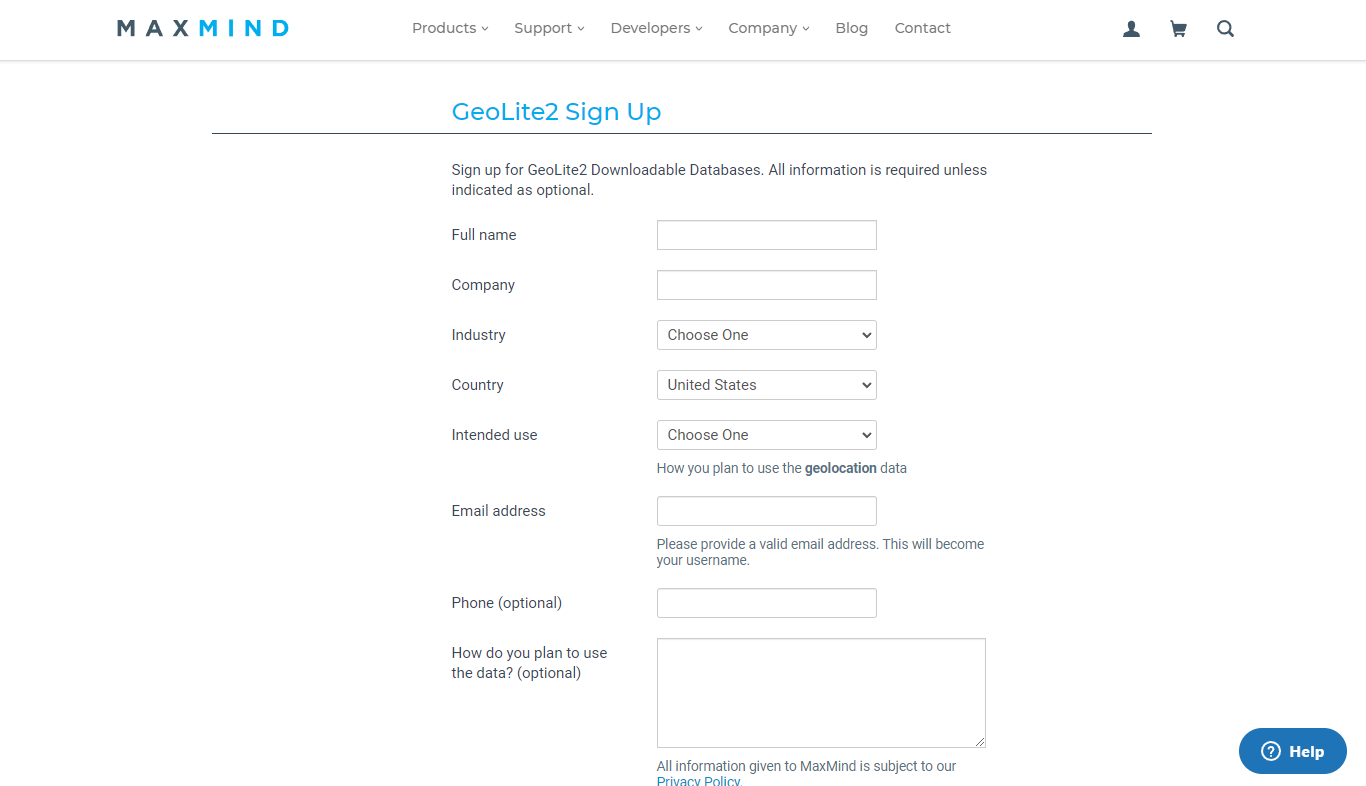
Step 2 – On the Sign Up page, complete the form with the relevant information, and click “Continue”;
Step 3 – Next, you will receive the confirmation email with a link to set your password. Click on the link and choose your password.
Create Free MaxMind License Key
Now, you need to create your MaxMind license key:
Step 1 – Login to your MaxMind account;
Step 2 – Click on the “Manage License Keys” option on the left-side menu;
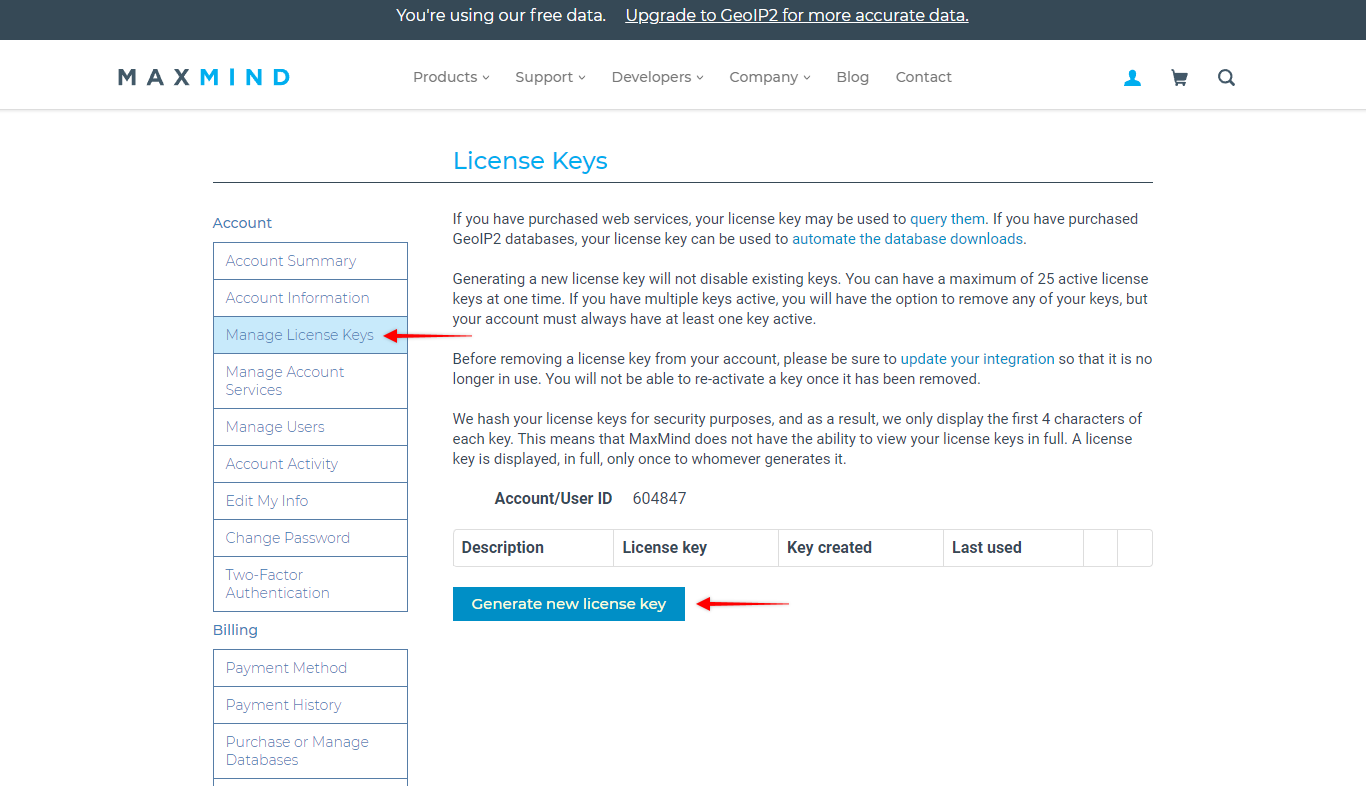
Step 3 – Here, click on the “Generate new license key”. Name your license key (License Key Description);
Step 4 – Also, you’ll see the notification “Will this key be used for GeoIP Update?”. Answer “No” and click on the “Confirm” button;
Step 5 – Your license key will be created and displayed. Please store your key somewhere safe as you won’t be able to see it again.
Note:
Keep in mind that you can generate up to 25 license keys in your MaxMind account. Though the number of licenses is limited, you can use the same license on multiple sites.
Configure Display Conditions Settings
Once you create your license key, you will need to configure it in Display Conditions settings:
Step 1 – Navigate to Dashboard > Settings > UAE > Display Conditions > Settings;
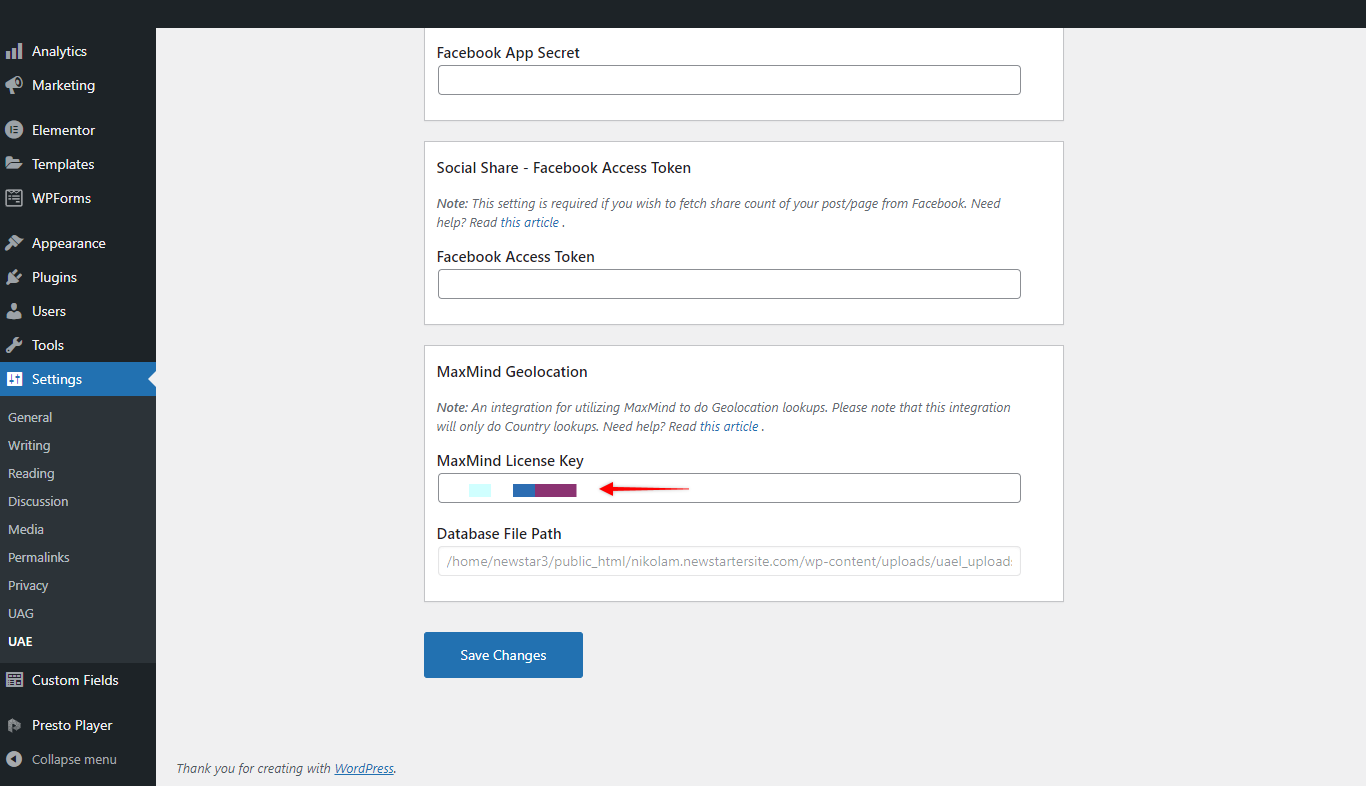
Step 2 – Scroll down to the “MaxMind Geolocation” section and add your license key. Click “Save Changes”;
How To Set Geolocation Condition?
Once you have added the MaxMind license, you can use Geolocation as a condition for displaying content.
Let’s say that you have a special discount that is available only in the United States. Thus, you would want to display this deal only for users from the United States. To illustrate, we will show you how Geolocation Condition works on this example:
Step 1 – Start editing page or post with Elementor, and click on the element you wish to add Geolocation conditions;
Step 2 – Now, switch to the Advanced tab, scroll down to “UAE – Display Conditions”, expand it and enable the option;
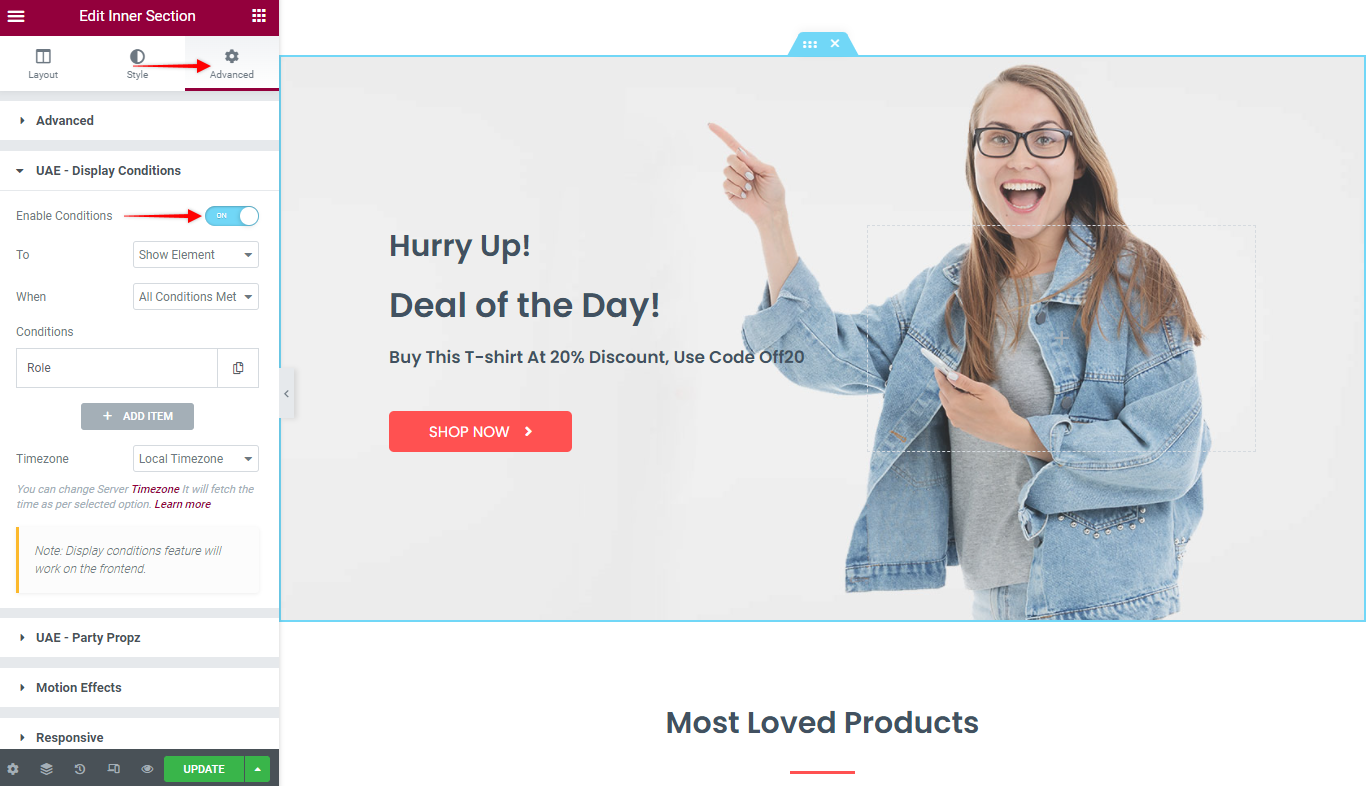
Step 3 – Firstly, you must select whether to Show or Hide the Element when the condition is met. For our example, we will select “Show Element”;
Step 4 – Next, set the condition to Geolocation and configure it. You need to select whether the condition should be applied (“Is”) to the selected country or not (“Is not”). Also, you need to select the country.
In our example, we need the section to be visible when the user is from the United States. Thus, we will set the condition to “Is” and “United States”:
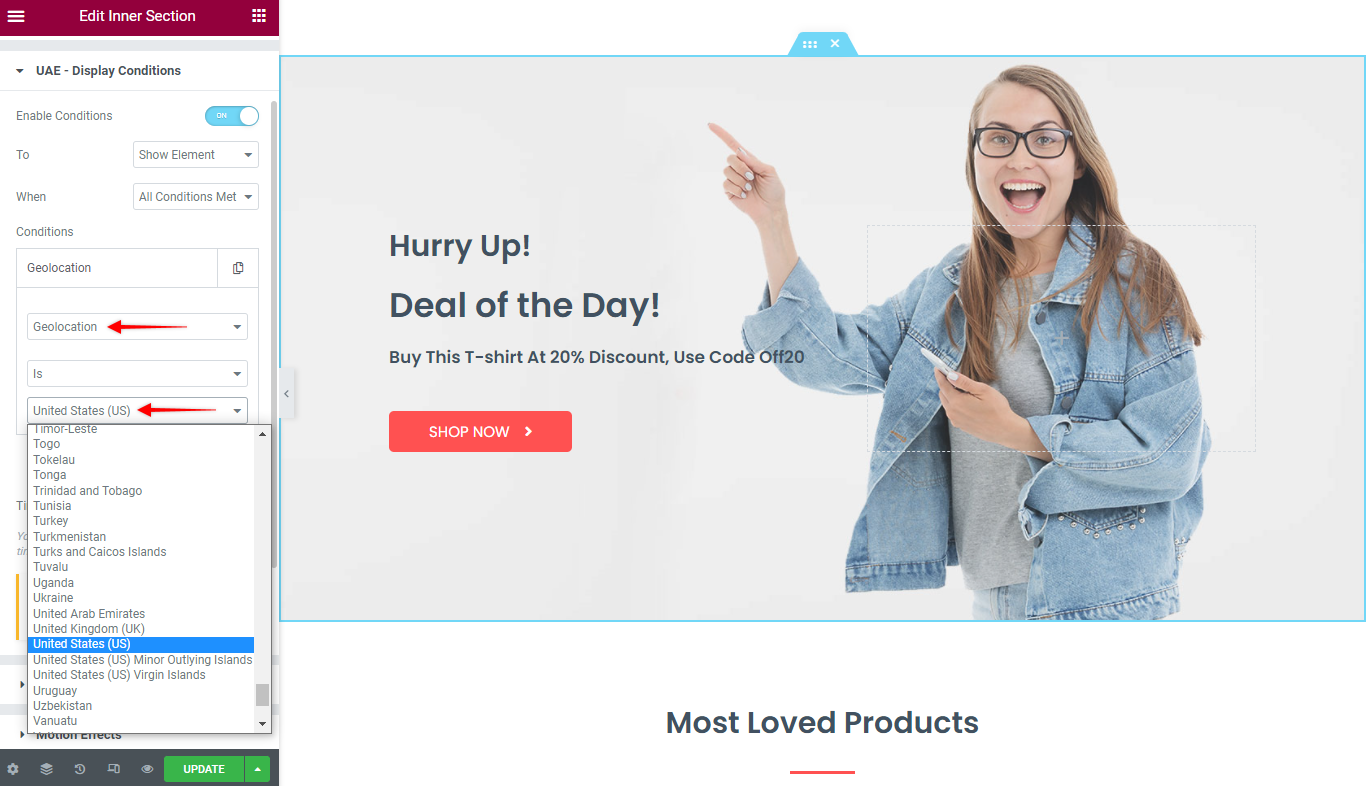
Step 5 – Finally, if you’re using several conditions, you need to decide when the conditions are met. If you want all set conditions to be fulfilled, you must select “All Conditions Met”. Otherwise, setting “Any Condition Met” will require that only one of the conditions is met.
Note:
Please keep in mind that if you’re using multiple Geolocation conditions (more than one country), you need to set the “When” option to “Any Condition Met”.
Step 6 – Click on the “Update” button to save changes.
Now, in our example, the section containing the discount offer will be shown only if the website is accessed from the United States. Otherwise, it will be hidden.
To conclude, you can now have a website displaying targeted content for users in different locations with minimum effort.